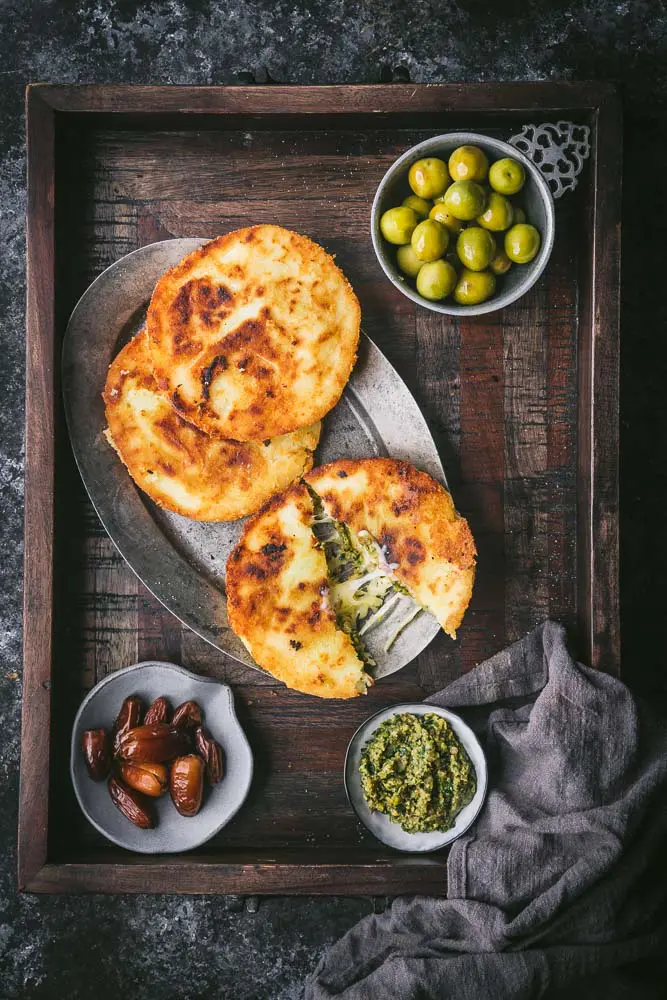
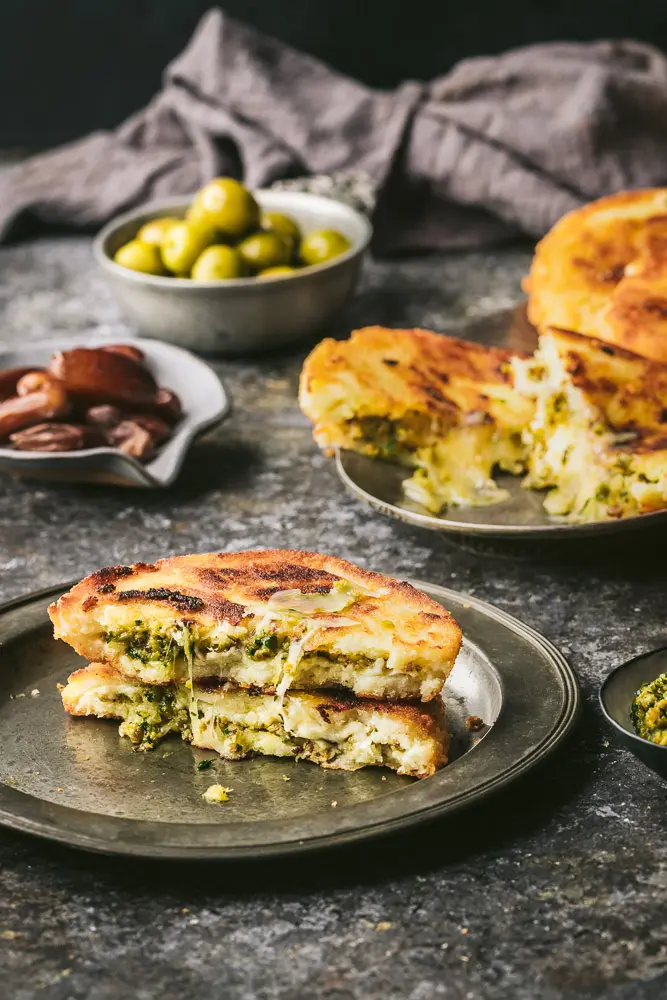
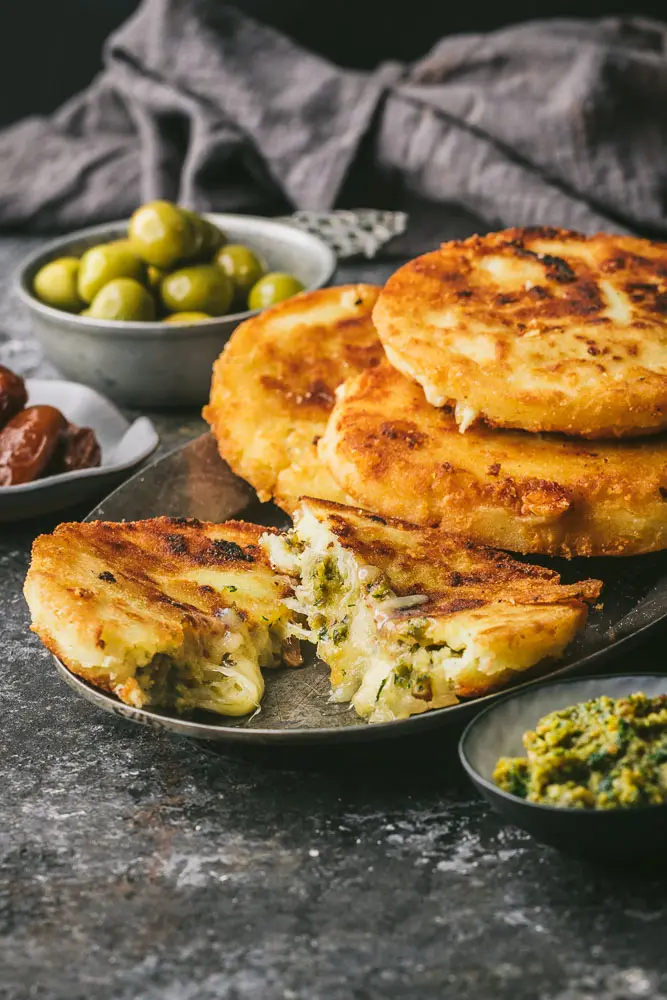
These cheese arepas have a double whammy of flavor. Cheddar cheese in the dough helps them cook up beautifully crispy and golden brown. They’re stuffed in the center with Cheddar and jack cheese and a delicious green olive and date spread. Our arepas are sweet, savory and bursting with cheesy goodness.
When I was in college, one of my roommates and dearest friends was from Colombia. Sometimes, late at night when the munchies hit, Adriana would make arepas on a hot plate in our dorm room. Slathered with melting butter, or stuffed with sharp cheese and guava paste, the hot corn cakes were everyone’s favorite snack. Still to this day, the sweet corn smell of them makes me think of her.
Arepas are cornmeal cakes found all over South America, particularly in Colombia and Venezuela. Traditionally, they’re made from dried corn which has been soaked, pounded and formed into patties. Now most people buy a pre-cooked cornmeal called masarepa, mixing it with water to form an instant dough. Masarepa is pretty widely available in the US. Look for it in the Latino aisle of any large supermarket: P.A.N., Goya, and Doñarepa are the most common brands we’ve found. You can find it in both yellow and white varieties. We usually use white masarepa, but either will work in this recipe.
Often, we fry arepas first, then split them down the middle and fill them sandwich-style. (See our Arepas with Pulled BBQ Chicken, Cheddar, Pickled Onions and Avocado). This time we wanted to stuff them with the filling before frying. They end up like a grilled cheese sandwich, but with crispy corn cakes in place of the bread. (Note: Masarepa flour is entirely corn-based, so arepas are gluten free.)
The cheese
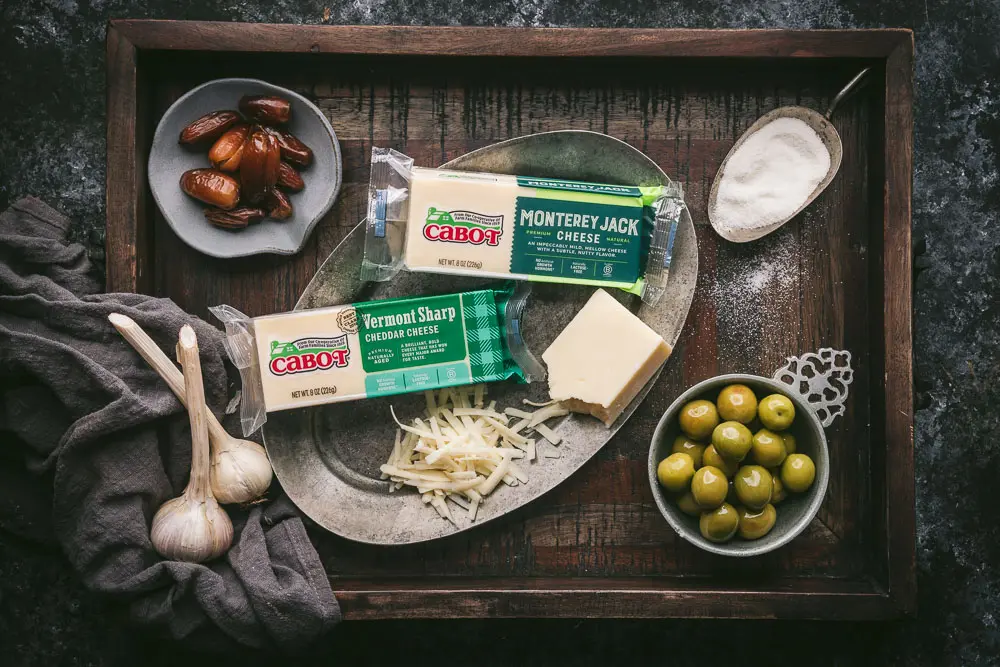
It’s not a stretch to say the most important ingredient in cheese arepas is the cheese. We wanted cheese in the dough itself, not just for flavor, but because it crisps up, almost like frico (also known as cheese crisps). Sharp cheddar is perfect for this, so we went with our favorite Cabot Vermont Sharp Cheddar which is tangy and buttery. For the stuffing, we use a 50-50 mix of two cheeses: some more of that sharp cheddar, because we can’t get enough of it, and Cabot Monterey Jack, because it melts like a champ and gives us that gooey cheese pull that is just so satisfying. You could use just one or the other, but we prefer the combination.
The olive and date spread
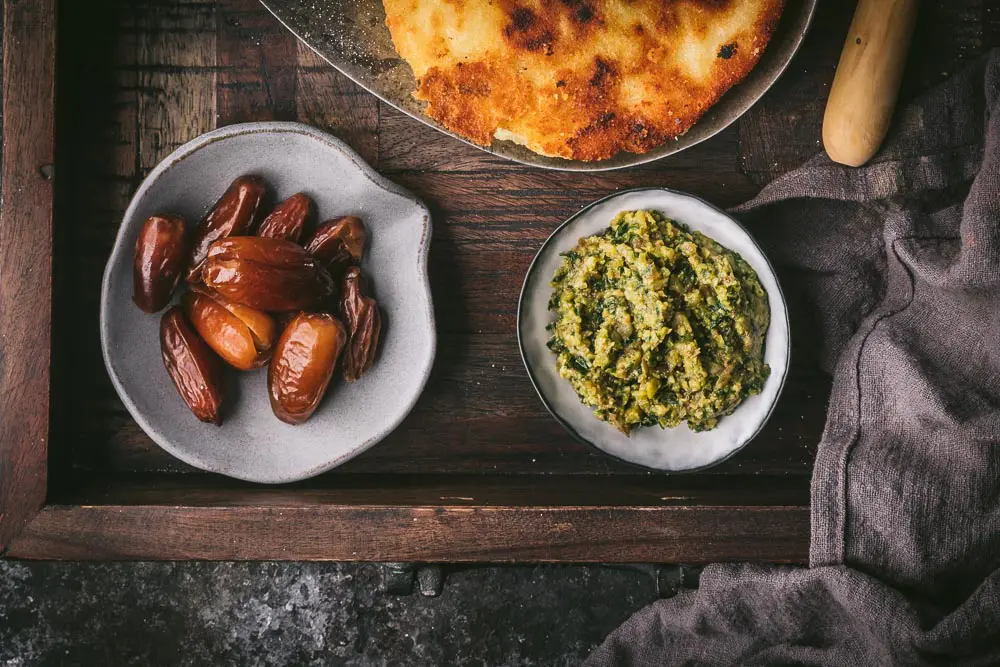
Sharp Cheddar cheese pairs perfectly with a sweet and savory condiment. While dates and olives might sound like an odd combination, the result is amazing. It’s similar to a tapenade, but the dates add a level of almost caramelized sweetness to the briny, herby mix. With a little bit of garlic, a few anchovies and some good olive oil, it’s delicious enough to eat on its own, simply spread on a cracker.
And it could not be more simple to make, especially if you have a food processor. We love the flavor of green Castelvetrano or Cerignola olives best for this. Both are sharp and a little bit buttery, and they give the paste a beautiful rich green color.
Start by pitting the olives. We like the flavor of un-pitted olives better: pitted olives sit in brine for packing, which can make the them mushy and over-salty. To pit the olives, use the flat side of a large knife, the bottom of a small skillet, or any heavy, flat surface, to press the olive gently but firmly until the flesh splits. At this point, you can easily pull out and discard the pit. Likewise, if you have unpitted dates, you can break them apart, or cut a small seam and pull the pit out with your fingers.
Add the pitted dates and olives to the food processor and pulse them a few times to give them a head start in the chopping process. When you’ve broken them up into a chunky mixture, add the grated garlic, roughly chopped parsley, basil and anchovies. I promise the anchovies won’t make the spread taste fishy but they do add a salty savoriness that is unbeatable. Pulse the mix again, slowly adding the olive oil, until the paste is spreadable but still a little coarse. Taste and season it with salt, if needed. (The olives and anchovies are already salty so you may not need to add any extra.)
the arepa dough
Masarepa is precooked so you only need to add water and a little salt for flavor. We usually start with a 1:1 ratio of masarepa to water, so 2 cups of masarepa will need 2 cups of water. Mix it together with clean fingers, until all the water is absorbed. Let it sit for a couple of minutes while you grate the cheese. After a couple of minutes, squeeze a bit of the dough in your hand: if it forms a solid shape and doesn’t feel dry, add the 4 ounces of grated cheddar (about 1 1/2 cups when grated on the large holes of a box grater). If the dough feels dry or crumbles, add a little more water, a tablespoon at a time, until it feels supple and holds together easily. Mix the cheese in to evenly distribute.
Divide the dough as evenly as you can into 8 golf ball-sized rounds. Place a sheet of plastic wrap or parchment on top of a work surface. Use your fingers to shape each ball into a flat patty about 5-inches wide and 1/4-inch-thick. Now you’ll add filling to four of the patties. Spread about 1 1/2 tablespoons of the date/olive spread into the center of one disk, leaving a 1/2-inch gap all round. Add a quarter of the remaining cheese over the spread, leaving the gap. Place a second disk on top and thoroughly press the edges to seal them well. If the top patty breaks or is difficult to handle, you can use a spatula or bench scraper to move it and just press together any rips or tears with your fingers. This dough is pretty forgiving.
Press with your fingers to make the arepa as flat as possible and shape the edges of the disk so that it’s as even as you can make it. Make sure there are no open holes or tears so the cheese doesn’t leak out. Repeat with the other balls of dough so you have four stuffed cheese arepas. Move them to the refrigerator and allow them to chill for about 20 minutes. This will make them easier to handle.
Pan frying the cheese arepas
Start by heating the oven to 300ºF and position a rack in the center. You’ll probably have to cook the arepas in batches so you can keep the first batch hot while you cook the second batch.
Set a large (12-inch) cast iron or non-stick skillet over medium heat, and add about 1/8-inch oil (just enough to coat the bottom of the pan with a thin layer). Once the oil is hot and shimmering but not smoking, add the arepas, working in batches as needed. Let them cook, without disturbing, for a minute or so, until a crust forms on the bottom. Once they can be moved without sticking, rotate them around the pan occasionally so they brown evenly. Cook until the first side is golden brown, about 5 minutes. Flip them and cook on the second side until it’s also golden, about 3 to 4 minutes longer. Transfer the cheese arepas to a cooling rack set on a rimmed baking sheet and place in the oven while you cook the next batch. Serve immediately.
Ultra-Cheesy Arepas with Date and Olive Spread
Ingredients
For the Date and Olive Spread
- 1 cup green olives, pitted (160g) (Castelvetrano or Cerignola recommended),
- 1/2 cup roughly chopped dates, pitted (70g) (recommended Mejdool)
- 1 medium garlic clove finely grated
- 1/4 cup roughly chopped parsley leaves (12g)
- 1/4 cup roughly chopped basil leaves (12g) or use 1/2 cup parsley
- 2 anchovy fillets finely chopped, optional
- 3 tablespoons extra virgin olive oil
- Kosher salt if needed
For the Arepas:
- 2 cups pre-cooked white or yellow corn meal, such as P.A.N. (320g)
- 1 1/2 teaspoons kosher salt
- 2 cups warm water plus more as needed
- 6 oz sharp cheddar grated, divided (about 1 1/2 cups)
- 4 oz Monterey Jack grated (about 3/4 cup)
- Neutral oil like vegetable or canola as needed
Instructions
To make the date and olive spread:
- Add the olives and dates to a food processor and pulse until a chunky paste forms. Add the garlic, parsley, basil and anchovies and pulse again, slowly adding the olive oil, until the paste is spreadable but still a little coarse. Taste and season with salt, if needed. Set aside.
To make the arepas:
- Heat oven to 300ºF and position a rack in the center.
- Add the cornmeal and salt to a large bowl. Add 2 cups warm water, mixing with your fingers until a soft, moist dough forms. If the dough feels dry, add more water, 1 tablespoon at a time, until dough holds together easily when squeezed.
- Add 4 oz (about 1 1/2 cups) of the grated cheddar, and mix until it’s evenly distributed. Cover the bowl with a damp paper towel and let rest for 5 minutes. Combine the remaining grated cheeses in a bowl.
- Divide the dough into 8 golf ball-size rounds. Place a sheet of plastic wrap or parchment on top of a work surface. Use your fingers to shape each ball into a flat patty about 5-inches wide and 1/4-inch-thick.
- Spread about 1 1/2 tablespoons of the date olive spread into center of one disk, leaving a 1/2-inch gap all around. Add 1/4 of the remaining cheese over the spread, leaving the gap. Place a second disk on top and thoroughly press the edges to seal them well. Press with your fingers to make the arepa as flat as possible and shape the edges of the disk so that the arepa is as even as you can get it. Repeat with the other balls of dough. Chill for 20 minutes.
- Set a 12-inch cast iron or non-stick skillet over medium heat and about 1/8-inch oil. When the oil is hot but not smoking, add the arepas, working in batches as needed. Cook, moving them around the pan occasionally, until the first side is golden brown, about 5 minutes. Flip arepas and cook on second side until golden, about 3 to 4 minutes longer.
- Transfer to a cooling rack set on a rimmed baking sheet and place in oven while you cook the next batch, if needed.
- Serve hot, with any leftover olive-date spread for anyone who wants more.