Matt here. Emily’s going to come in with the important tasting notes and all that later in the article, but I just wanted to share an anecdote from our very early cohabitation. When we first moved in together, I remember I was clearing room in the fridge – and at the time, Emily had a really beautiful spacious fridge (I think it was even bigger than the one we have now) and there was plenty of room to hide stuff at the back of the shelves. I was clearing out room to fit in whatever we’d bought together at the store, and I spotted a jar whose contents were unfamiliar to me. I opened the lid and, I don’t remember now, but I probably cursed. I think I might have warned Emily that there was something really bad in there that needed to be thrown away right that second, and preferably triple-bagged. I warned her that we might have to replace the fridge. I warned her that we might have to move.

My Coming-to-Kimchi Story
It took me a while to get my taste buds around kimchi. I had a relatively sheltered culinary upbringing, and if it wasn’t something we’d roast on Sunday, I probably wasn’t familiar with it. Being introduced to spicy, garlicky fermented cabbage at the age of 30 felt like being told that Earth had two moons but you’d never seen one of them because it was always on the other side of the world. I literally had no frame of reference to know what to do with it. But within a few short – OK, it took years, I’ll admit it – within a few long years I was thoroughly hooked. I’ve always loved assertive, funky flavors (Marmite, anyone?) and now we keep a kimchi jar in the fridge on a continuous basis.
One of our first entries on the blog described a class we’d taken in Beacon where we’d learned the fundamentals of simple fermentation. We ended up with kombucha (made with a scoby culture) and pickled dilly beans. At the time we both turned to each other and said “hey, we should definitely make kimchi sometime soon” and “soon” turned into five years, which is awful because it’s super easy and tasty and we buy a jar of it pretty much weekly.
Also, with inspiration on Youtube from lovable doofuses like Maangchi and Brad, how can you NOT make a big tub of kimchi?
Variations on a Kimchi Theme
There are many, many variations on kimchi, and kimchi itself is really just a local form of the worldwide taste for pickled vegetables that includes sauerkraut and cornichons), but you can see from the videos that the general approach is the same. Today we’re going to stick with a recipe that relies on ingredients that you can get almost entirely from your supermarket, with the possible exception of two items: glutinous rice flour, and gochugaru. The good news is, you can actually skip the rice porridge stage if you can’t find glutinous flour, and you can substitute regular red chili flakes for the latter. We’ll mention these variations when we get to the recipe section. If you’re vegetarian, you can also omit the fish sauce and use soy instead.
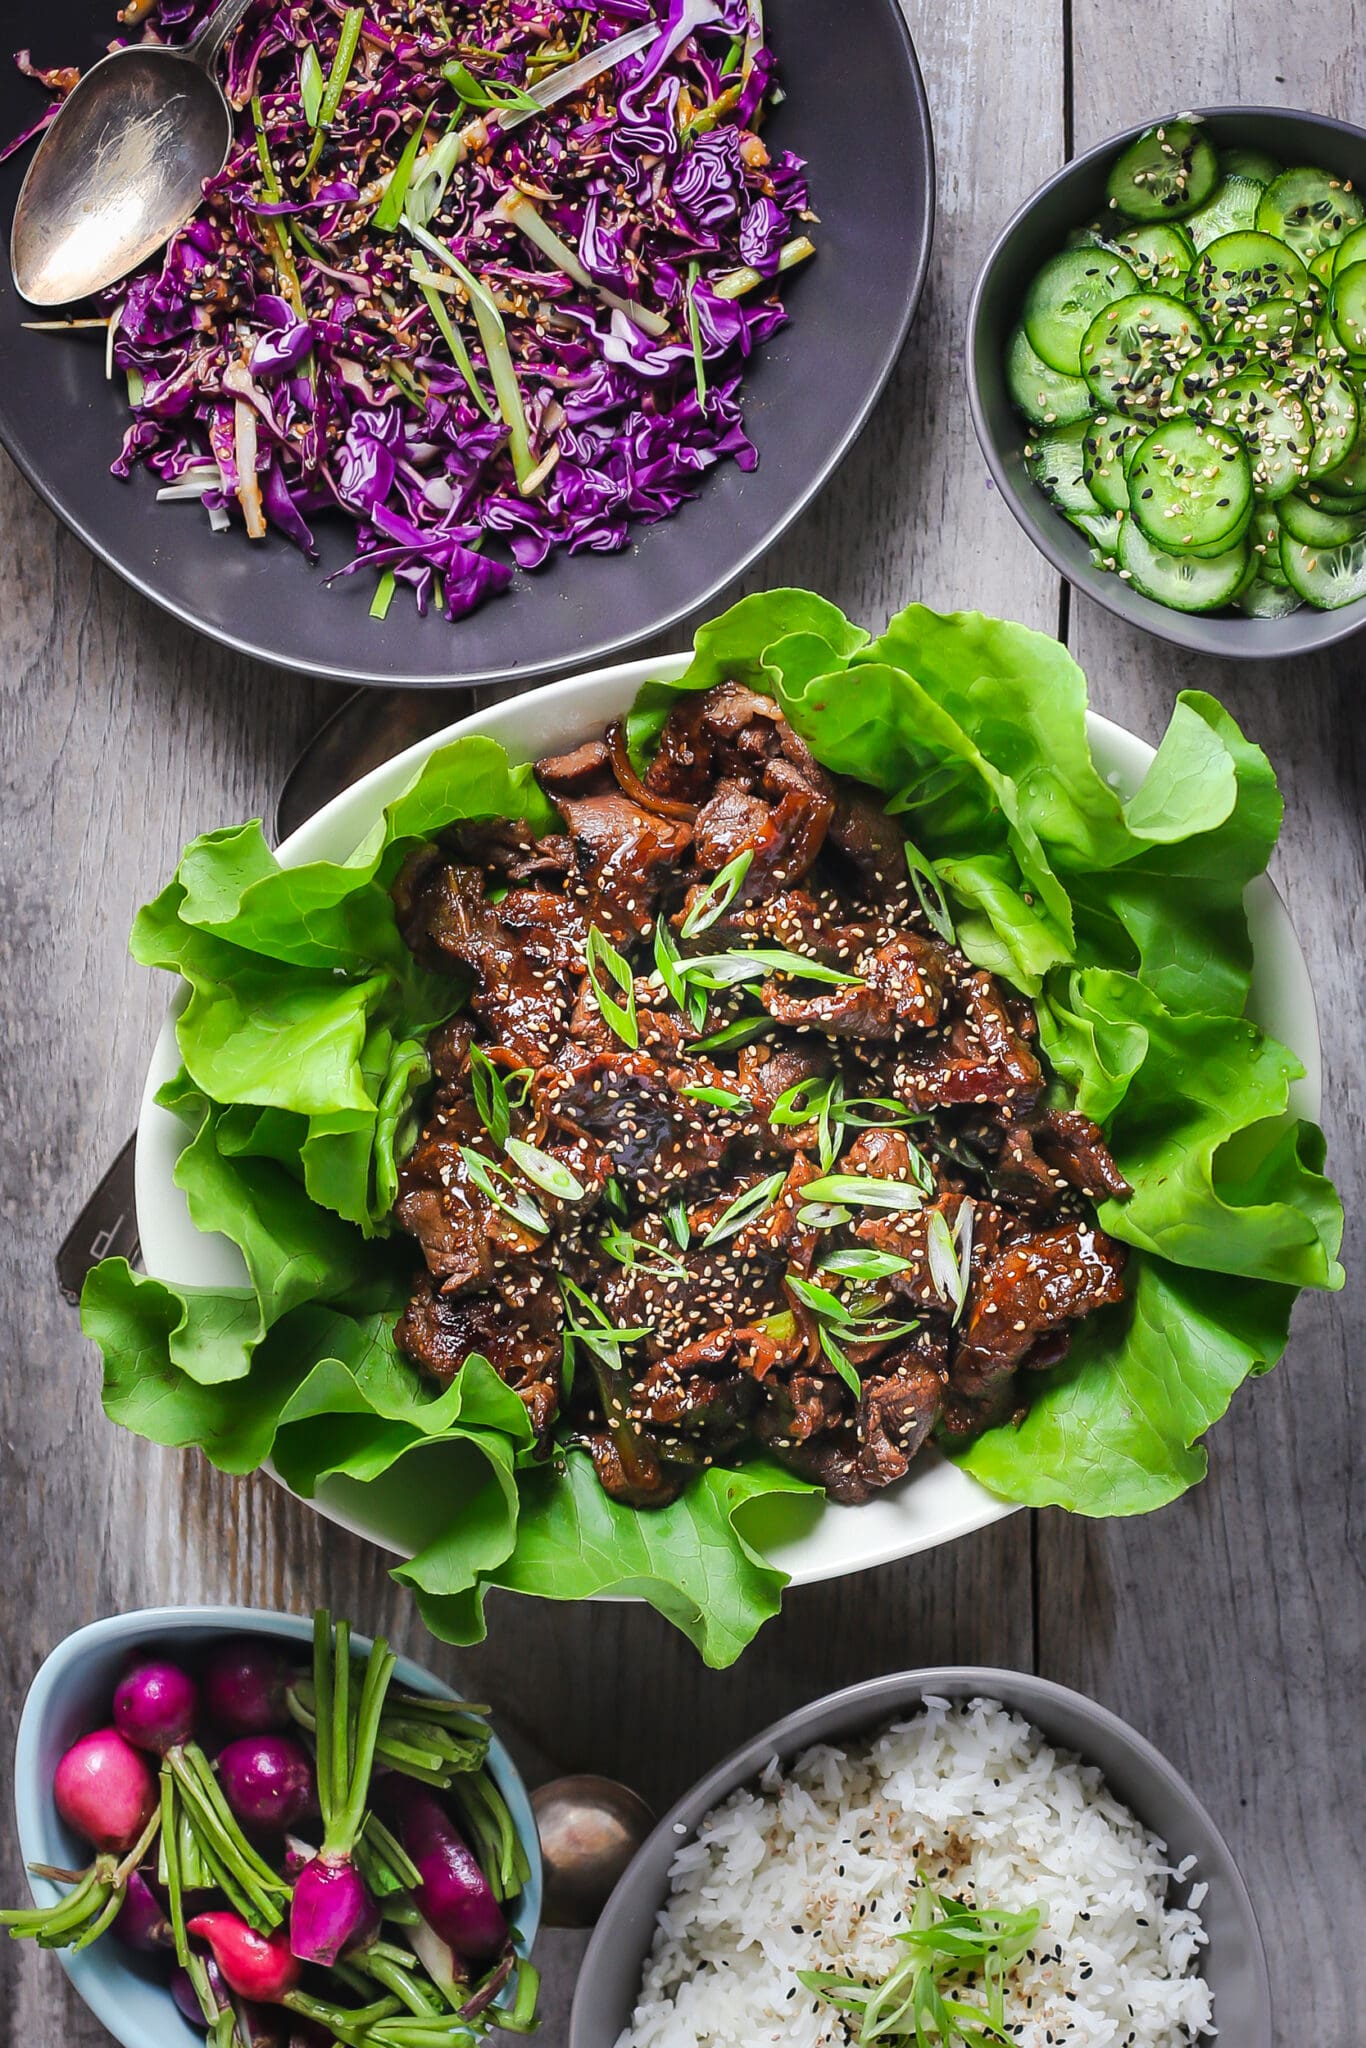
Once you’ve made the kimchi, of course, there’s a million things you can make with it (other than eating it as a condiment/side dish). Here are a few recipes you’ll find on our site:


Ok, on to the recipe! Where to start? Let’s start with the napa cabbage. (Can you use regular green cabbage? Absolutely, and it’s called yangbaechu-kimchi. However, napa is traditional and we think it gives better texture to the final product.)
The Cabbage
Unless you have an industrial kitchen, or a LOT of sink and counter space, you’ll probably want to max out at two heads of cabbage (about 3-4 lbs). Our recipe is for half that (just one head) so feel free to double if you’re feeling ambitious.
Split the cabbage heads into quarters, lengthwise – some people like to start the cut at the root and then hand-tear the leafy part, but it’s fine to cut all the way through. Cut out the hard root part, and chop the remaining leaves into lengths of about 3 inches. Rinse the leaves in cold water, separating them out so that everything gets wet through, then drain the excess water out of the bowl. Once the leaves are wet, it’s time to salt. Just sprinkle it on and massage it in as best you can. What we’re doing here is not trying to make the cabbage salty – we’re actually extracting the leaves’ natural water content through osmosis. Salt breaks down the cell walls so that water is pulled out of the cabbage, and will equalize the concentration of salt inside and outside the cell walls.
Wait For It!
And this process takes a while, depending on how much cabbage you have. You could leave it as long as 6 hours, but just a couple of hours is fine too, just remember to toss the leaves every half hour so that the salt is evenly distributed. Once the cabbage is nice and wilted and there’s a lot more liquid in the bowl than when you started, drain the water out and rinse the leaves thoroughly with cold water, pouring the water out and re-rinsing a few times – aim to get all the salt off, since the ingredients we’re going to add later will be plenty briny.
Making Porridge
In the meantime, we’re going to prepare the porridge. This sticky paste made with glutinous rice flour (don’t use regular rice flour, it won’t work!) helps to bind all the other ingredients together. Note: there is no actual gluten in glutinous rice flour, so you can happily make this on a GF diet. If you can’t find it, feel free to skip it, and your resultant kimchi will taste just as good, but will be a little looser. Do make the sugar water, though, because you need a little sweetness to balance out the spice we’re going to be adding next.
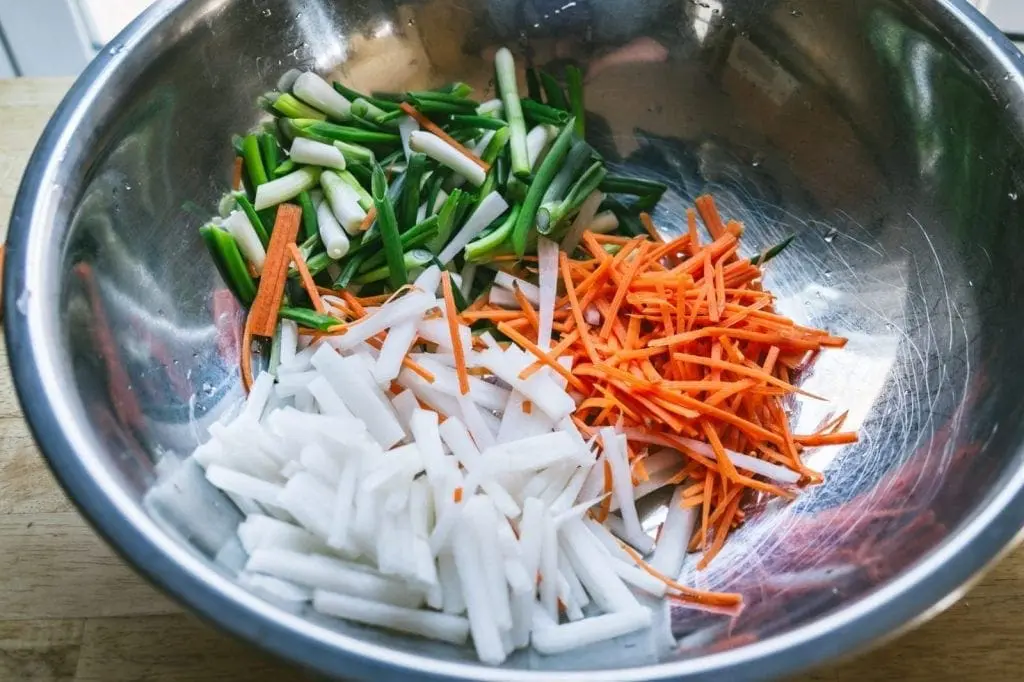
Veggie Prep
Get the rest of your veggies ready (we use carrots, daikon radish, sometimes Asian pear, if we have it) by cutting them into matchsticks, and also cut the scallions (and chives, if you’re using them) into 1-inch lengths. Asian pear is traditional in this recipe – you’ll also find it labeled as “apple pear”, but it’s fine to leave it out. Once the veggies are ready you can toss them into the big bowl with the salted and rinsed cabbage.
The onions, garlic, and ginger can be roughly chopped since they’re all going to get blitzed in the food processor anyway.
Adding Spice
Now to the spices. You might be surprised to find that kimchi isn’t necessarily super hot in terms of spice. The Korean red pepper used to make gochugaru is relatively mild (certainly compared to other kinds of pepper). The amount we suggest you add will result in a medium-spiced kimchi, though you can add more, or another heat source like cayenne, if you want it hotter.
If you aren’t able to find gochugaru (there’s a link to buy from Amazon, but if you have a decent Asian market near you, look there), you can use red chile powder, but don’t use as much: start with half the recipe amount and taste. Toss the onions, garlic, ginger, fish sauce (if using, or soy sauce), gochugaru, and the cooled rice porridge into the processor and pulse it into a paste .
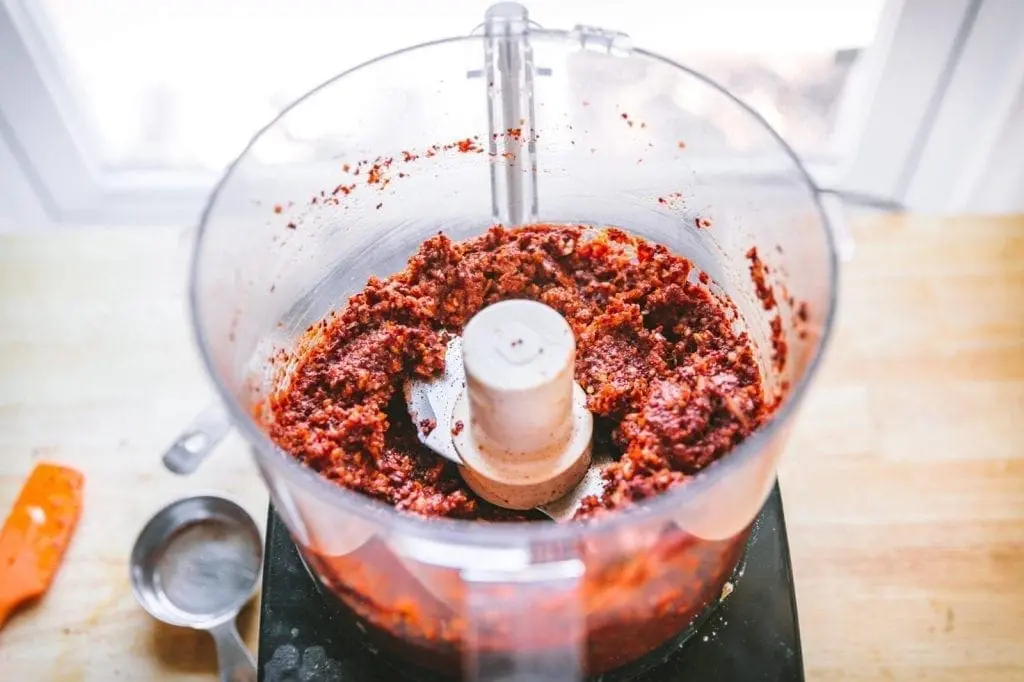
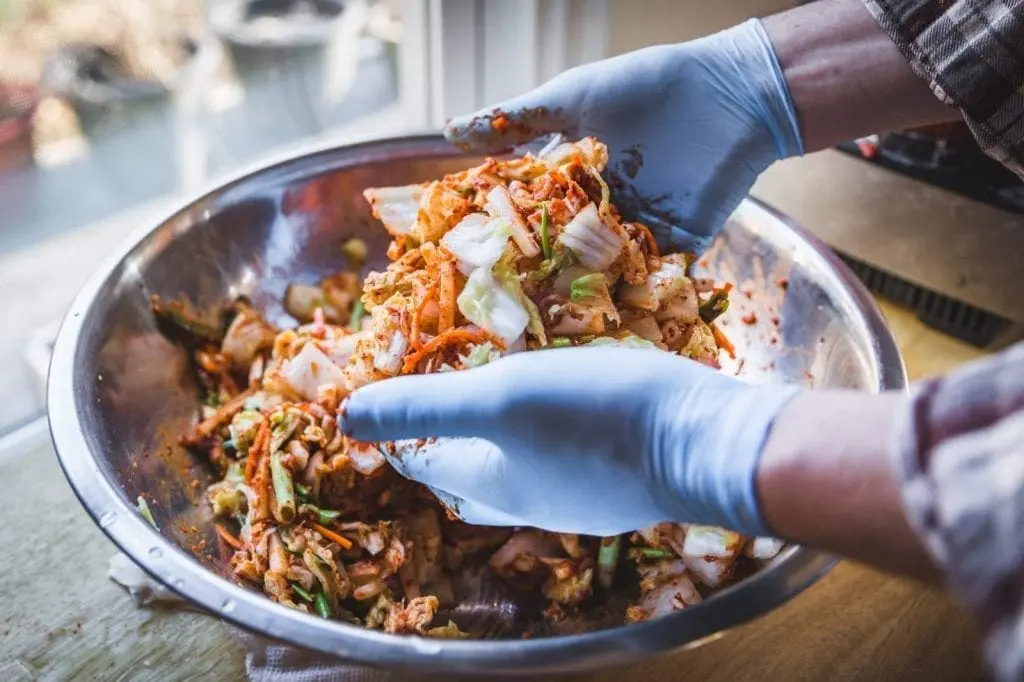
Add the spice paste to the bowl with all the vegetables and mix it well, with a gloved hand, until all the vegetables are nicely coated. The glutinous rice paste helps this process, but just keep tossing and you’ll get there.
Storage
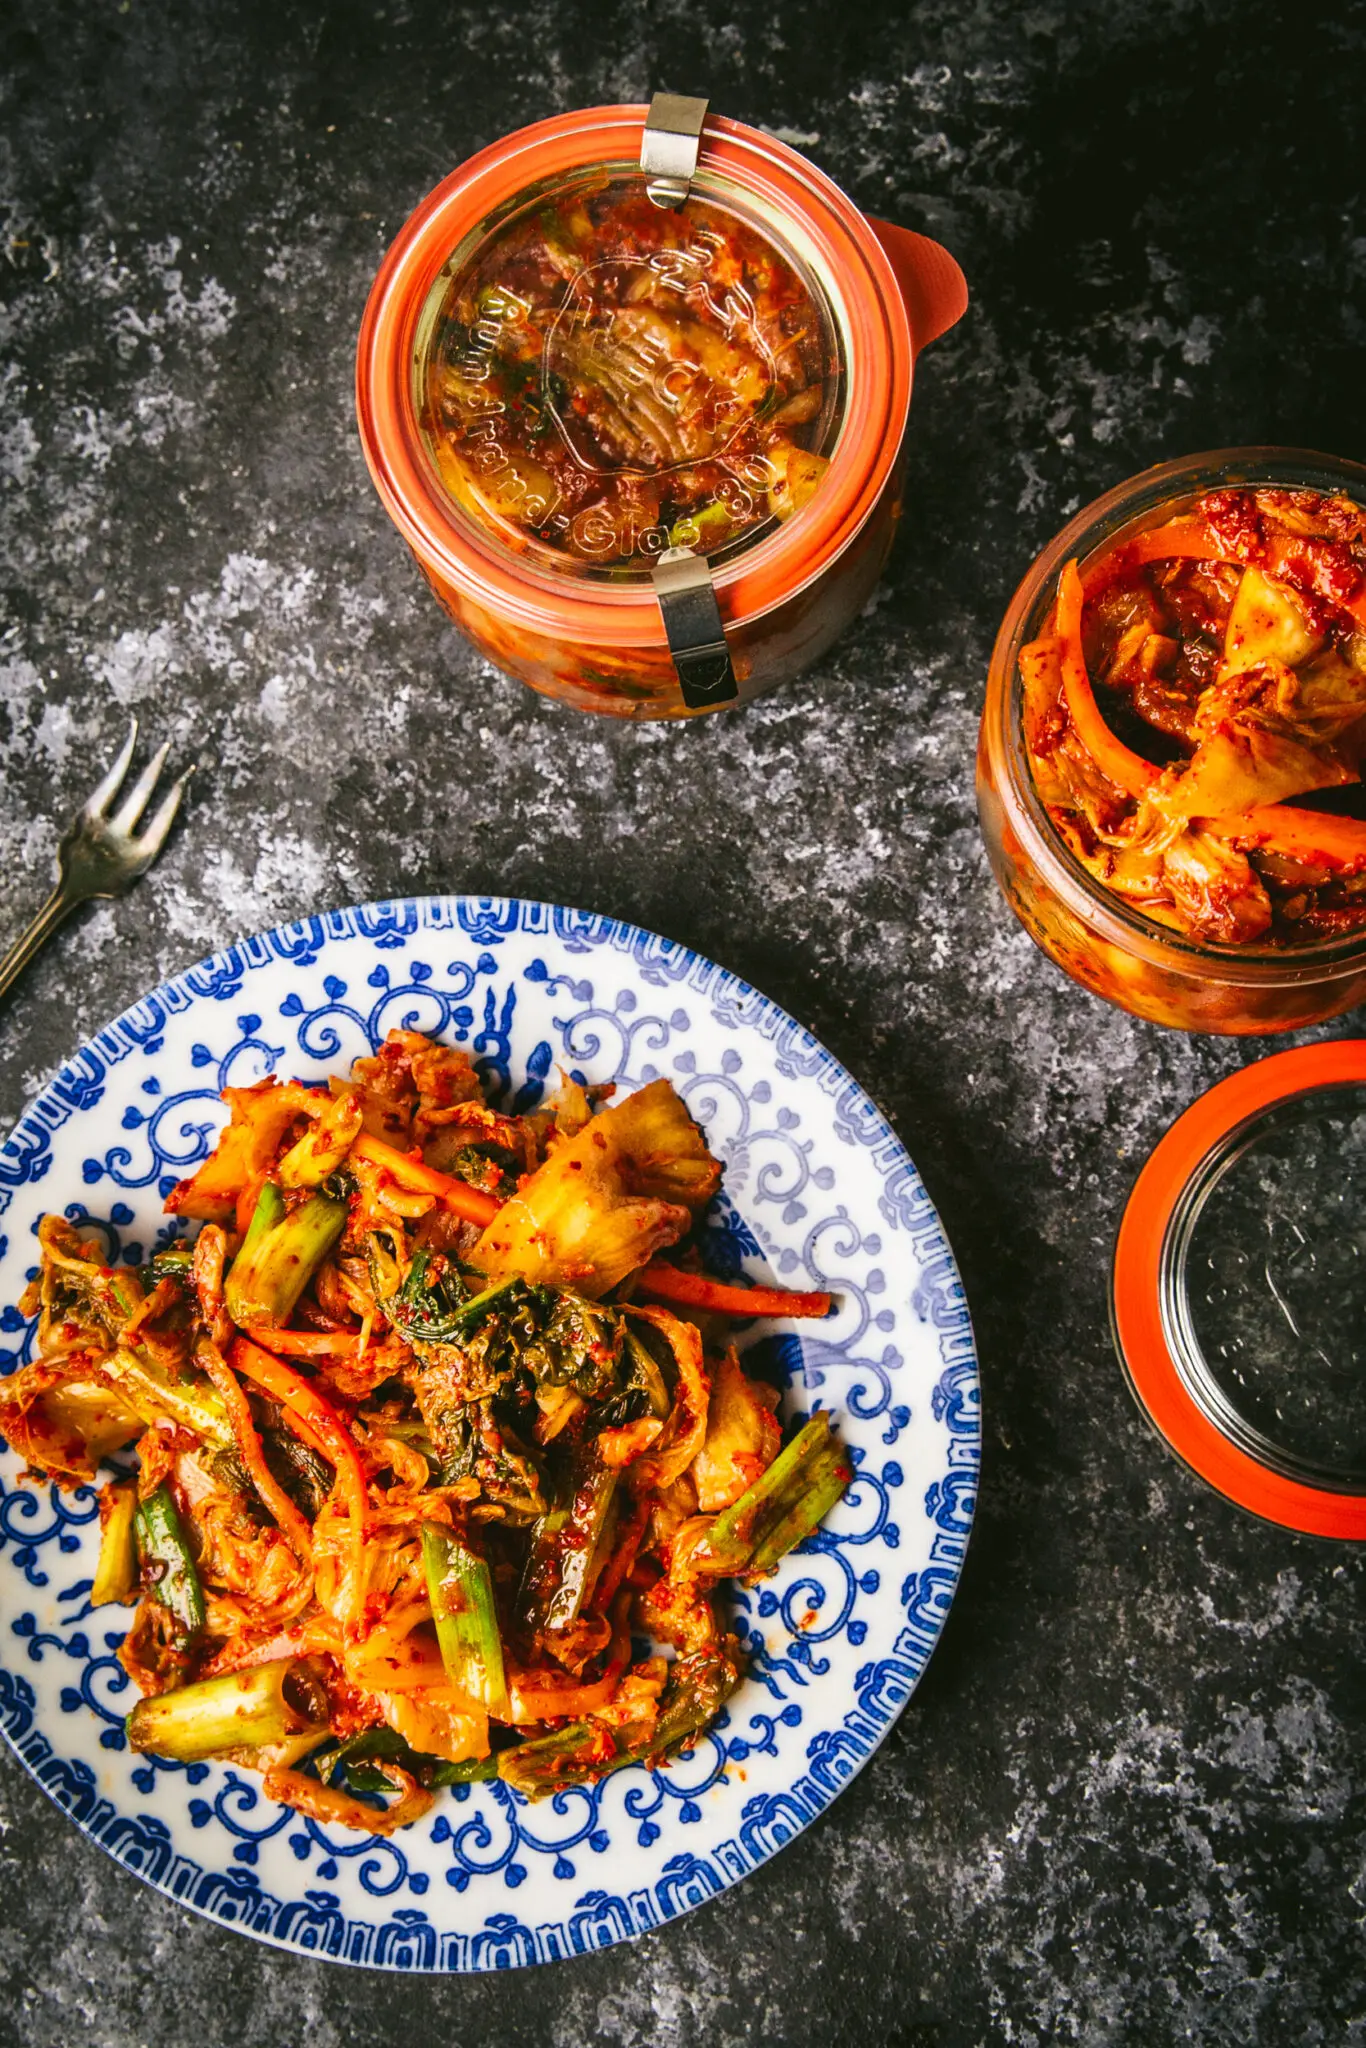
Now you can transfer your kimchi to a large glass jar (with fermentation valve, if you have one), or a fermenting crock, if you have one of those. Make sure to press down on the vegetables, really pack it in there, to get as much air out as possible. Ideally you want a layer of liquid brine covering the vegetables but don’t fret if it seems a little dry. More liquid will form as the vegetables ferment. Let the jars sit on the counter for about 1 – 2 days, until you see some bubbles form. Once that happens you can transfer the jar to the refrigerator (to slow the fermentation process down, if you like).
How much to age the kimchi?
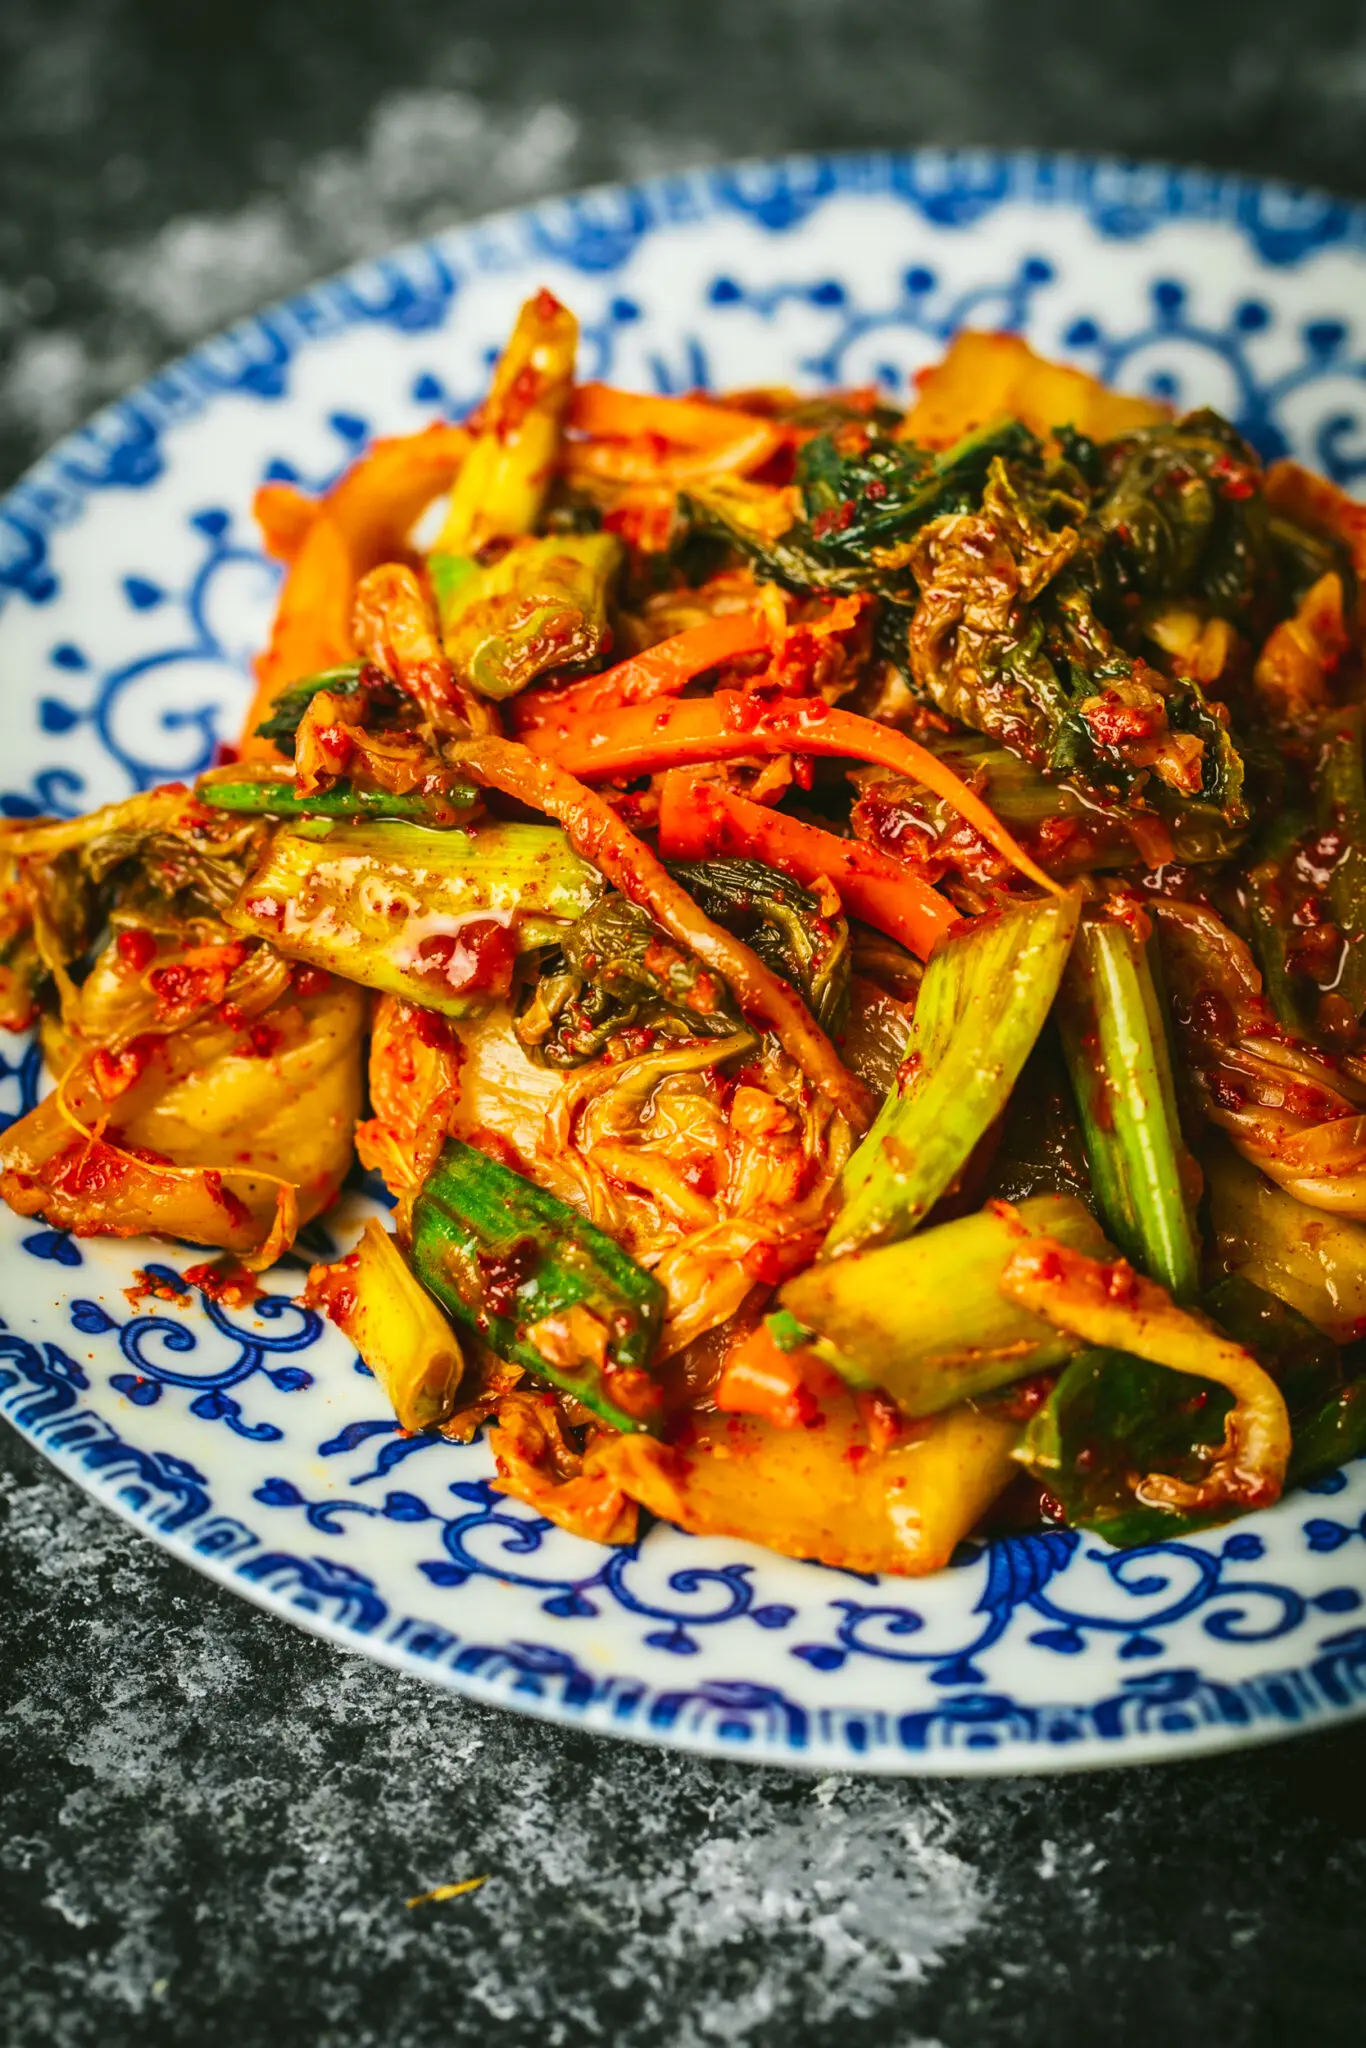
You can eat the kimchi fresh, but the real joy is tasting it as it ferments. It will start out crisp and crunchy (almost like a salad), and eventually, over 2 to 3 weeks, become soft and much more tart (kind of like sauerkraut). There are a lot of recipes that call for very ripe kimchi and kimchi brine (like our Kimchi and Shrimp Pancakes) so don’t throw it away! It’s delicious at every stage but you might find you have a favorite.
(By the way, if you’re interested in doing more with lactofermentation, you could take a look at Sandor Katz’s Wild Fermentation , originally published in 2003, which helped to ignite the resurgence of home fermentation in the US, something which fell out of favor with the ascendency of other preservation methods.)
Note
Note: You can’t really “can” fermented vegetables for long-term preservation, since you’ll destroy all the good probiotics you’re building up, and it’ll affect the texture of the cabbage. But your refrigerated version will keep for several months, if it lasts that long!
Let us know how you get on with your kimchi making!

Easy Home-made Kimchi
Ingredients
- 2 pounds 900g Napa cabbage (about 1 large or 2 medium)
- 1/2 cup 120g kosher salt (don’t use regular table salt)
- 1/2 cup water
- A tablespoon glutinous rice flour optional
- 1 tablespoon sugar
- A medium white onion about 8 oz / 230g, roughly chopped (about 1 cup)
- 8 garlic cloves smashed and peeled
- 1 1/2 inch piece ginger peeled, roughly chopped
- 3 tablespoons 44ml fish sauce (or soy sauce, if vegetarian)
- 2/3 cup gochugaru coarse Korean red pepper powder, or 2 to 3 tablespoons crushed red pepper flakes, ground in a spice mill (or more, to taste)
- 1/2 cup about 70g carrot, peeled, cut into 3-inch long matchsticks (about 1 large carrot)
- 3/4 cup about 100g daikon radish, peeled, cut into 3-inch long matchsticks
- 1/2 cup about 70g asian pear, peeled, cut into 3-inch long matchsticks (about 1/2 pear) (optional)
- 10 scallions cut on a diagonal into 1-inch pieces
- 1 large bunch Chinese chives cut into 1 inch pieces (optional)
Instructions
- Quarter cabbage lengthwise and chop each quarter into 3-inch pieces, discard root end. Add cabbage to a large bowl and rinse well with cold water. Drain out most of the water (it’s ok if you don’t get all of it out). Toss cabbage while sprinkling with kosher salt. Massage salt into leaves and let sit at room temperature at least 2 hours and up to 6 hours to allow liquid to release. Toss every 30 minutes or so. After cabbage is brined, rinse well in cold water several times until cabbage is no longer very salty. Drain excess water.
- Set a small pot on the stove and add 1/2 cup water and 1 tablespoon glutinous rice flour. Bring to a boil and stir until a thick paste forms. Add sugar and stir until dissolved. Turn off heat and allow to cool completely. (If not using rice flour, just heat water and sugar until sugar dissolves and set aside to cool)
- To the bowl of a food processor, add onion, garlic, ginger, fish sauce (or soy sauce), gochugaro, and cooled rice flour mixture (or sugar water) to bowl of food processor. Process until a coarse paste forms, scraping down the bowl, as necessary.
- Add carrots, radish, pear (if using), scallions and chives (if using) to the bowl with the cabbage and toss together. Add spice paste and toss, with gloved hands, until vegetables are fully coated.
- Divide kimchi and any liquid between jars, leaving 1″ room at top of jar, packing it down as much as you can. Seal with a lid and let jars sit on countertop for 24 to 48 hours to allow fermentation to begin, then refrigerate. Flavors will deepen over time.
- Do Ahead: Kimchi can be stored in the refrigerator for up to 2 months (or even longer). Open occasionally to release accumulated gas.
I made this per the recipe. I didn’t have access to sweet rice flour and instead used cornstarch. It turned out perfect. Was so darn tasty authentic flavor!
So glad you liked it!
I think the pear should be put in the food processor with the other ingredients, don’t you think ?
It’s not true that regular rice flour won’t work, we you consider that glutinous rice flours job in kimchi is to help the seasoning cling to cabbage or other veg you are using. Don’t sweat using a substitution!
My grandson did a wonderful job making the recipe. He used half powder and half coarse chili pepper and the color was beautiful. Loved it!
That’s wonderful, Amy! I’m so glad the recipe worked well for him.
Made this recipe few times now. It’s delicious.
Can’t source rice flower without buying online so I use cornflour instead.
Instead of the red pepper powder I use half of a 170g jar of rose harissa paste.
Hi Philip, so glad you like the recipe! Cornflour is a great substitute. Thanks so much for leaving a comment. If you have a moment, would you mind rating the recipe? It helps others find it when they do web searches. Thanks!