Cookbooks of yore have a few hard questions to answer. At some point in the past, a chef decided that adding a little mustard and paprika to a dish was so naughty that it deserved the description of “devilish”, and so, after publishing the notion, a recipe was born. Deviled eggs have been a mainstay of the informal gathering ever since, and if you never flicked through a cookbook from the 1960s with garishly-colored photographs of hip and happening party food, you’ve missed out on a treat.
But there’s no reason to leave deviled eggs in the past. They’re a classic dish that’s easy and quick to make, and with the right choice of filling, you’re onto a surefire winner. They’re also a great way to use up a surfeit of eggs, which in our household is most of the time.

Using Up Your Extra Eggs
If you’re a long term reader of the blog, you’ll recall that we have backyard chickens. It’s true that we haven’t blogged about them since 2015, since which time we’ve turned over the flock a couple of times. Right now we have nine hens who are either happily pecking around the garden, or in the coop noisily complaining that they aren’t happily pecking around the garden. Either way, they reliably deliver a good two dozen eggs a week at minimum. Most of those end up taken to the local community fridge or given to friends and neighbors. Even so, we end up with a lot of eggs to cook up.
Last year we put together an egg recipe roundup, including one of our most popular posts, Scotch Eggs with a Runny Yolk. This week we’re adding classic deviled eggs to that collection.
Tips for perfect hard boiled eggs
The first piece of advice for you may seem counter-intuitive: make sure that your eggs are not too fresh. For urban hen-keepers such as ourselves, this means carefully tracking the egg harvest and dating the boxes that pile up on the kitchen counter. For everyone else, wait a week or two after buying your eggs from the store. Older eggs will be much easier to peel once boiled: this is a generally good tip for any boiled egg recipe.
Not to get too science-ey (did we mention we were nerds?) but the long and short of it is this: the egg white or “albumen” in a fresh egg has a relatively low pH level, making it acidic. As it cooks, the egg whites form a tight bond to the inner shell’s membrane. As an egg ages, the pH level rises and the inner membrane can’t form as strong a bond to the albumen, so the shell peels off much more easily.
MAKING THE DEVILED EGGS
Now that your eggs have aged a little, it’s time to cook them. Instead of hard-boiled, think hard-cooked. Meaning, you shouldn’t maintain a rolling boil on the eggs for the entire duration of the cook. This helps prevent overcooking, and the tough whites and green-ringed yolk that are the hallmark of a bad boil. Steaming the eggs also works well, but we find the easiest method is simply boiling them correctly.
This entails bringing a large pot (at least 3 quarts) of water to boil. Keep the eggs cold in the refrigerator until you’re ready to cook them. Gently lower them into the water and allow them to fully boil for 30 seconds. Then cover the pot and turn the heat down to your lowest simmer setting and let them cook for 13 minutes. (This is the same technique we use for rice, by the way.) Once your timer goes off, transfer the eggs to an ice bath to stop any further cooking and allow them to cool completely.
To peel the eggs, gently roll them on a hard surface to loosen and break up the shell. Hold the egg under cool running water and pull the shell off. Once all the eggs are peeled, cut them in half the long way. Carefully separate the whites and yolks. Set the whites aside and add the yolks to the bowl of a food processor (you can also mash them by hand but they won’t be quite as smooth and fluffy). Add the mayonnaise, mustard, vinegar, salt and pepper and whizz it up until smooth and fluffy, scraping down the bowl as needed. Next, add the chives (you could also use finely minced scallions) and, what to me, is the key ingredient, sweet pickle relish.
I have to give credit to my bestie, Catherine, who served deviled eggs at a garden party that blew my mind. They were ridiculously good. Of course I had to know the recipe immediately (so I could put my spin on it and plaster it all over the internet. She knows who she’s dealing with). When she told me what was in the filling, it was pretty much what I expected – except for the relish. It adds the perfect hint of sweetness, tartness and texture that takes them over the top. I’ve since discovered that it’s a relatively common ingredient in the Southern version of deviled eggs but it was a revelation to me. So, thanks Catherine!
Perfect for making ahead
Deviled eggs are the perfect party food, not just because they’re so tasty, but because they are very amenable to being made in advance. For me, this is pretty much a party food requirement because once guests arrive (and I’ve had a cocktail or two), I’m much less adept with the kitchen skills.
Luckily, shell-on hard-boiled eggs can be stored in the refrigerator for up to 5 days. Once peeled, they can be refrigerated for up to 1 day. The filling and egg whites can be refrigerated separately up to a full day ahead. Even the filled eggs can be covered loosely in plastic wrap (so they don’t get squished), and refrigerated for up to 3 hours. I like to garnish them just before serving to keep everything looking perky, but it’s by no means a requirement.
it’s all in the presentation
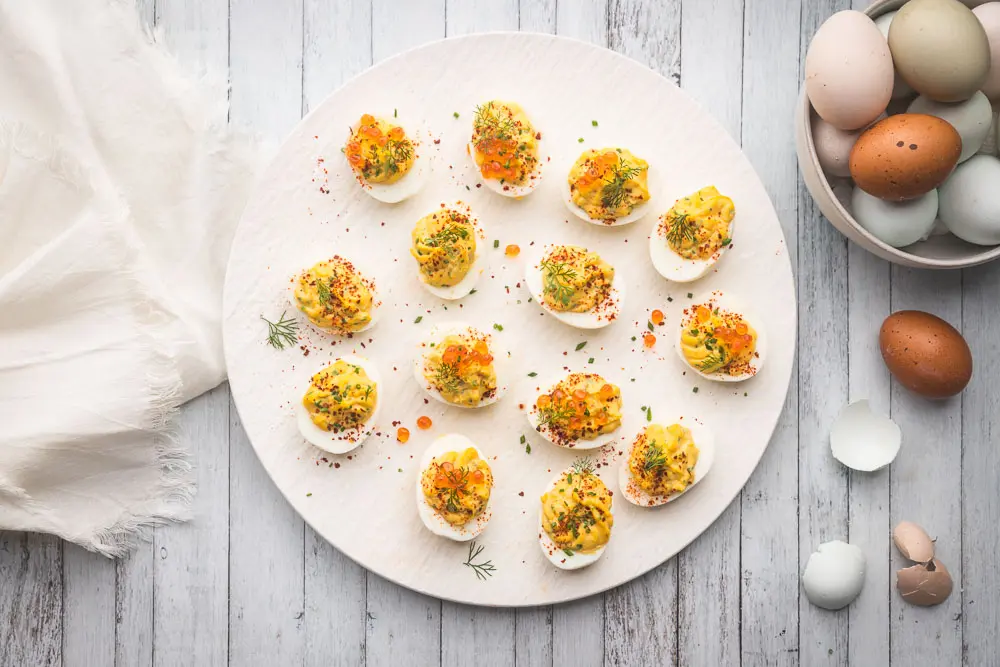
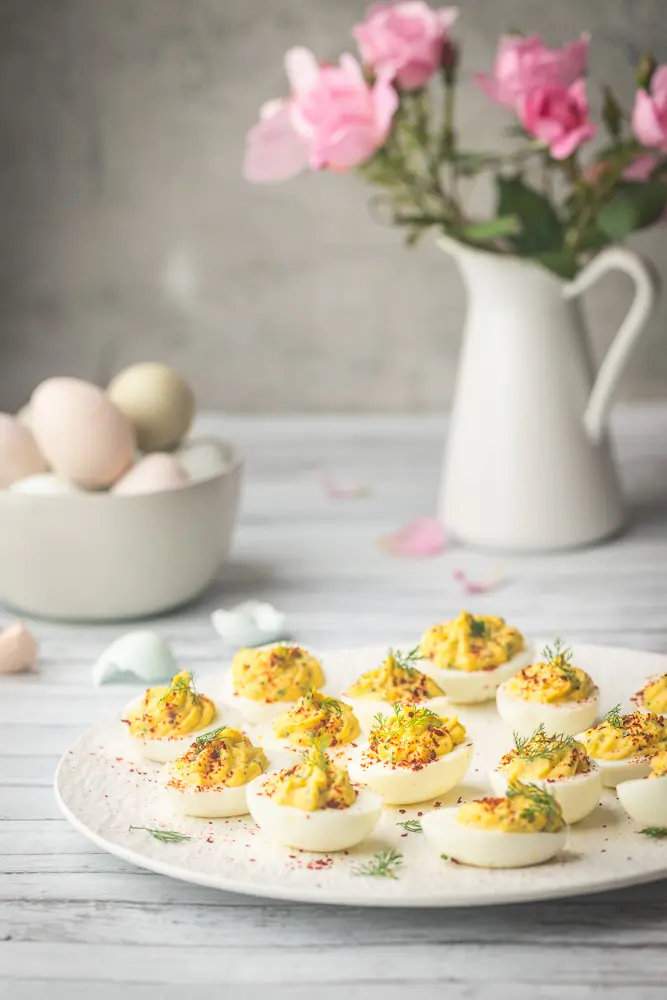
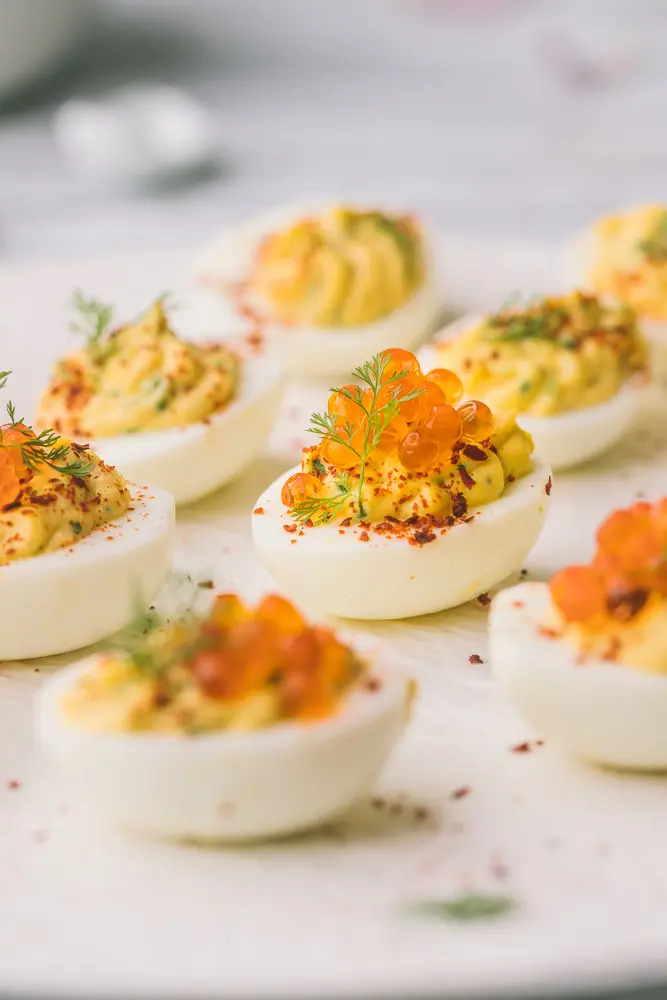
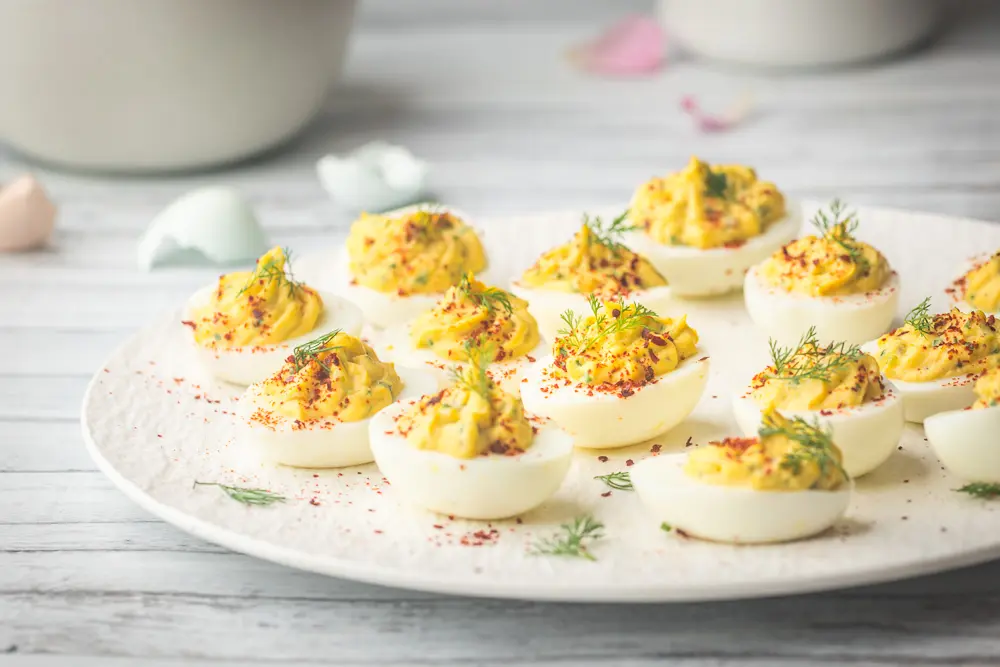
The most fun part of the process is the piping. Get your egg-white halves arranged on the platter first, since it’ll be easier than moving them afterwards. If you want a pretty shape to the filling, you’ll need a piping bag with a filling tip (we went with a medium-sized star shape), but you can also use a sealable plastic bag with the corner cut out. Stuff the halved whites with a good amount of the filling, mounding at a little over the top of the whites. Top each egg with your garnishes of choice. We like a sprinkle of spicy, fruity Aleppo pepper in place of the classic paprika. As well as more minced chives, a tiny sprig of dill if we have some growing in the garden, and if it’s a special occasion, a tiny dollop of briny, salty salmon roe.
And the results? Simply angelic.

Classic Deviled Eggs
Ingredients
- 12 large eggs refrigerated, not too fresh
- Ice for an ice bath
- 6 tablespoons mayonnaise
- 2 1/2 teaspoons smooth dijon mustard
- 2 teaspoons rice or white wine vinegar
- 1/4 teaspoon kosher salt
- Freshly ground black pepper to taste
- 2 1/2 tablespoons sweet pickle relish
- 2 tablespoons finely minced chives plus more for garnish
Optional garnishes
- Sweet or hot paprika, or spicy chili flakes
- Minced chives or dill
- Salmon roe or other caviar
Instructions
- When ready to cook, add ice to a large bowl of cold water and set aside.
- Bring a large pot (at least 3 quarts) of water to boil. Use a spider or slotted spoon to gently lower the eggs into the pot and continue to boil for 30 seconds. Cover tightly, reduce heat to very low, a bare simmer, and continue cooking for 13 minutes. Remove the eggs to the bowl of ice water and allow them to cool for at least 15 minutes before peeling under cool running water.
- Cut the eggs on half. Remove the yolks and place them in the bowl of a food processor (or mash by hand in a medium mixing bowl). Add the mayonnaise, mustard, vinegar, salt and pepper and process until smooth, scraping down the sides of the bowl as necessary, about 1 minute. Add the relish and chives and pulse for a second or two until everything is fully combined.
- Transfer the yolk mixture to a piping bag with a star tip, or a sealable plastic bag*. Snip off a corner of the bag and pipe the filling mixture into egg whites, slightly overstuffing each. You may have one or two extra whites (save them for another recipe). Garnish each egg with a sprinkle of paprika or chili flakes, a few minced chives and/or a sprig of dill, and a little dollop of salmon roe, if you're feeling fancy,
- Serve immediately or cover loosely with plastic wrap and refrigerate for up to 3 hours.
Classic deviled eggs are always a crowd-pleaser, and your recipe looks perfect, I love the tips you provided for getting the eggs just right and the idea of adding a touch of paprika for extra flavor. These will definitely be a hit at my next gathering. Thanks for sharing this timeless recipe.