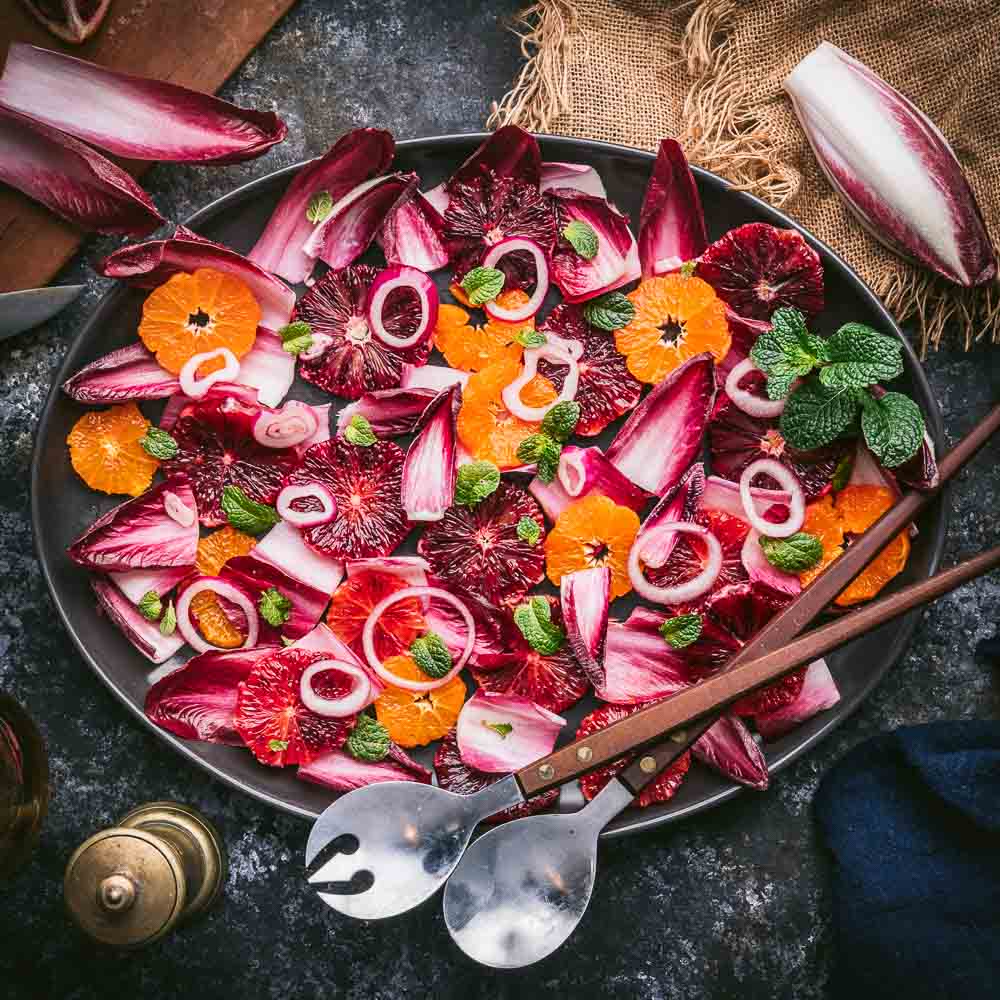
The thing about early spring, at least here in the Hudson Valley, is that it basically looks and feels exactly like winter. For most of March and even into April, it’s cold and damp, and nothing in the garden will grow. During these dog days, a bright and zingy citrus salad feels like a life-saver. And it’s simplicity itself: juicy, sweet blood oranges (and a few mandarins for variety’s sake), tossed with crisp endive and some quick-pickled red onions. Toss over a little peppery mint and pistachios for crunch and that’s it. A drizzle of good olive oil and a sprinkle of flaky salt is all the dressing it needs.
Does anything taste more like sunshine than citrus?
You don’t hear much about the danger of scurvy these days but after the year we just had, I’m legit concerned. Between the harsh winter weather and pandemic quarantining, I feel like some kind of timid woodland creature, blinking in the unfamiliar sunlight before darting back into the safety of my lair. Give me all the vitamins, please.
Making the salad
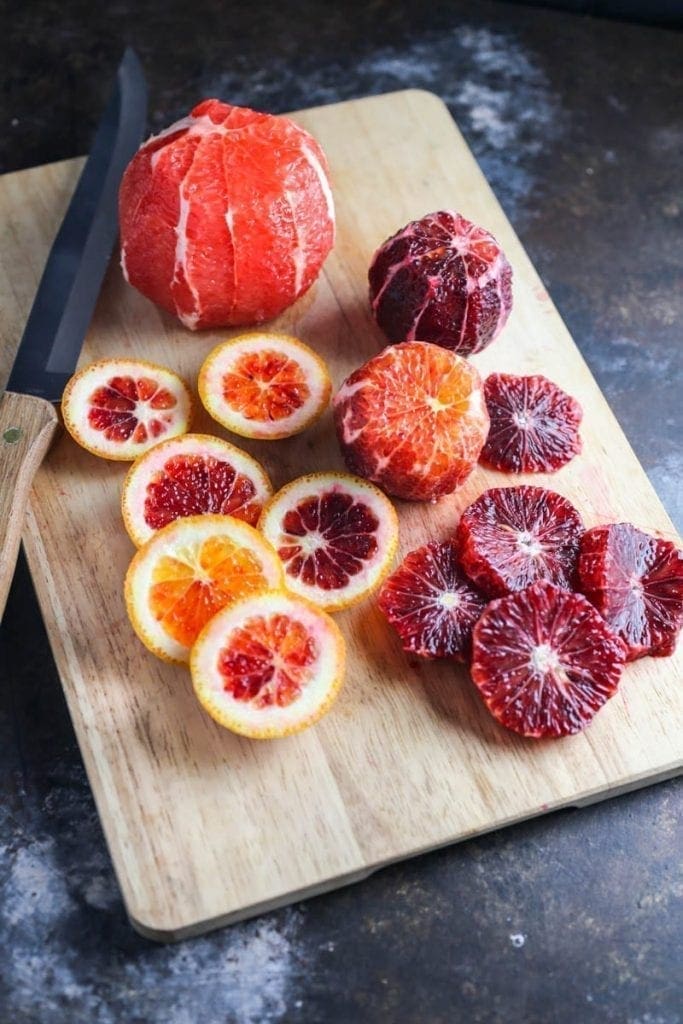
This citrus salad is like a restorative tincture, but delicious. We used blood oranges and satsuma mandarins, but any combination of oranges, mandarins or tangerines will work just as well. Use a sharp knife to to cut the top and bottoms off the oranges, and then follow the shape of the fruit to cut off the peel, including the bitter white pith. Slice them into rounds and there’s most of the work done.
Use blood oranges if you can find them, if not, any juicy oranges will do.
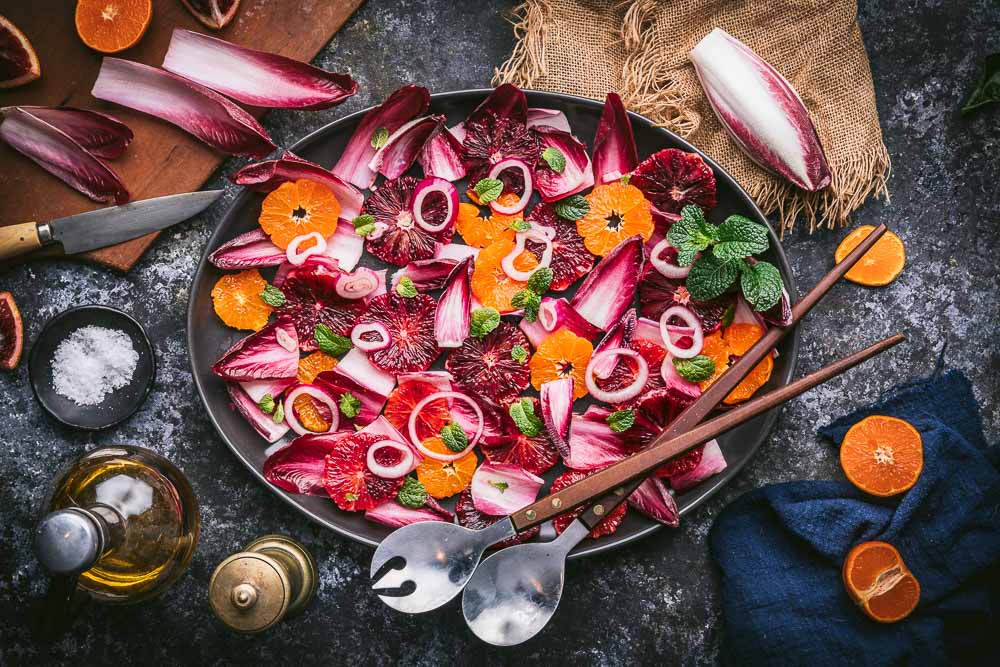
To balance the sweet fruit, we lightly pickle some red onions in a simple brine of red wine vinegar, salt and sugar. We often have a jar of pickled red onions ready in the refrigerator, which makes this salad even faster. It only takes 15 minutes or so to soften the onions, so if we’re making them fresh, we’ll get them in the brine first so they’ll be ready by the time the oranges are sliced.
Next, roughly chop the endive (or whatever leaves you prefer) and scatter them on a platter along with the sliced citrus rounds. I can never resist red-tipped endive when I find them but regular green endive works just as well. Radicchio would also be delicious, though its bitterness puts some people off ( we love it). Kale would also be a good option, though we recommend massaging the leaves with a little olive oil, to soften them.
A light sprinkle of Maldon salt (or any flaky sea salt) and a good crack of pepper is the final touch.
A drizzle of good olive oil and a sprinkle of flaky sea salt is all the dressing it needs.
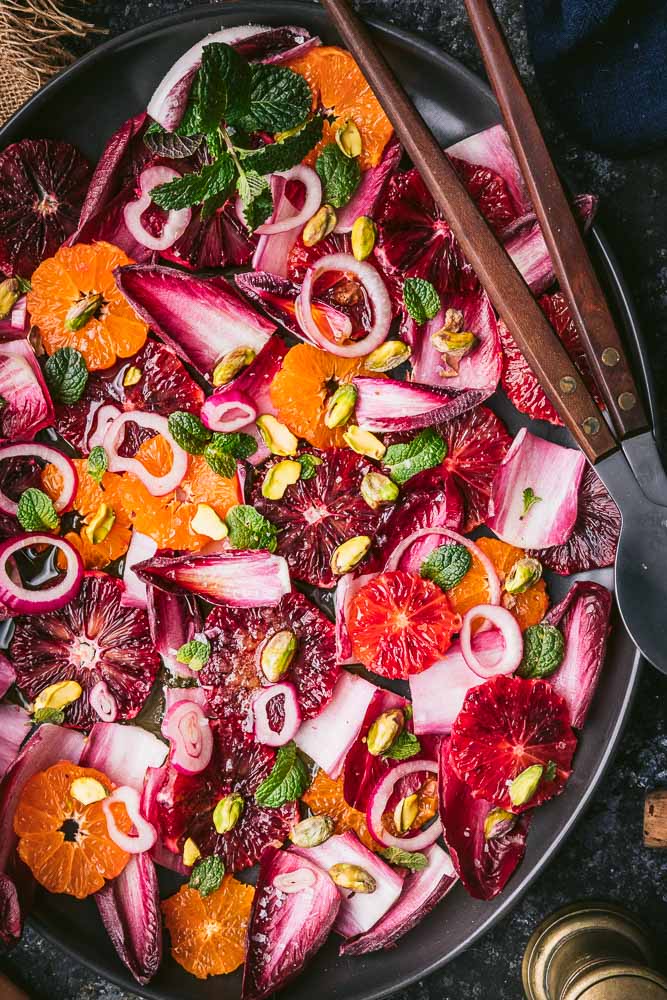
Blood Orange and Endive Salad with Pickled Red Onions
Salads don’t have to be green to be healthy. In early spring, our vitamin-depleted bodies crave fresh citrus salad: sweet and tart blood oranges combined with crisp endive, pickled red onion and some crunchy toppings.
1/2 small red onion (thinly sliced)
1/4 cup red wine vinegar
1 teaspoon sugar
Kosher salt
4 blood oranges (or an equivalent mix of various oranges)
2 heads endive (red or green, leaves separated and roughly chopped)
2 tablespoons roughly chopped mint
3 tablespoons pistachios or other nuts
3 tablespoons extra virgin olive oil
Maldon or other flaky sea salt (to taste)
Freshly ground black pepper (to taste)
In a small bowl, toss the red onion with the vinegar, sugar and 1 tablespoon water. Season with a pinch of salt. Let sit at room temperature until softened, about 15 minutes. Set aside.
Meanwhile, using a sharp knife, cut the tops and bottoms off the oranges, then cut off the peel, removing all of the white pith. Thinly slice the oranges crosswise, removing any pits. Arrange the oranges and endive on a platter and scatter over the red onions, mint and pistachios on top. Drizzle with the olive oil and season with Maldon salt and freshly ground black pepper, to taste.
Happy New Year, pals! Whoo! Last year did fly by, didn’t it? No, I’m kidding of course, it didn’t fly by, it was grim and interminable and everyone hated it, but at least we’re spinning away from the winter solstice. January 2021 is now upon us, and we can fall back on tried and tested aphorisms such as “it’s darkest before the dawn” and “soup is the best thing to get you through January”. (Sometimes we change that to “whisky is the best way to get through Tuesday” but a lot of you are doing dry January and we don’t want to put you off your game.)
Soup is so essential to maintaining our sanity through the short, cold winter days that we always cook up a big batch of stock from the roast turkeys and rotisserie chickens that we’ve made since November, and then freeze it in large ice cube trays or plastic containers, so we have a store of rich, versatile broth for any soup recipe we need. Often, too, we’ll make a large pot of soup from the broth, and then freeze that so it’ll last several weeks. We’ve already blogged some of our favorites: a thick Nettle (or Spinach) and Potato soup, a Creamy Mushroom Soup with Black Rice, which quickly became a favorite, a classic Tomato Soup (with cheesy toasts that will blow your mind) and a Chicken and Potato Chowder (which we made a batch of last month and thawed this week). There’s a reason why “Chicken Soup for the Soul” is a trademark, and there’s a reason why chicken soup works so well to raise the spirits. We’d like to introduce you to our new favorite variation on the theme: Gingery Chicken and Rice Noodle Soup with Crispy Garlic.
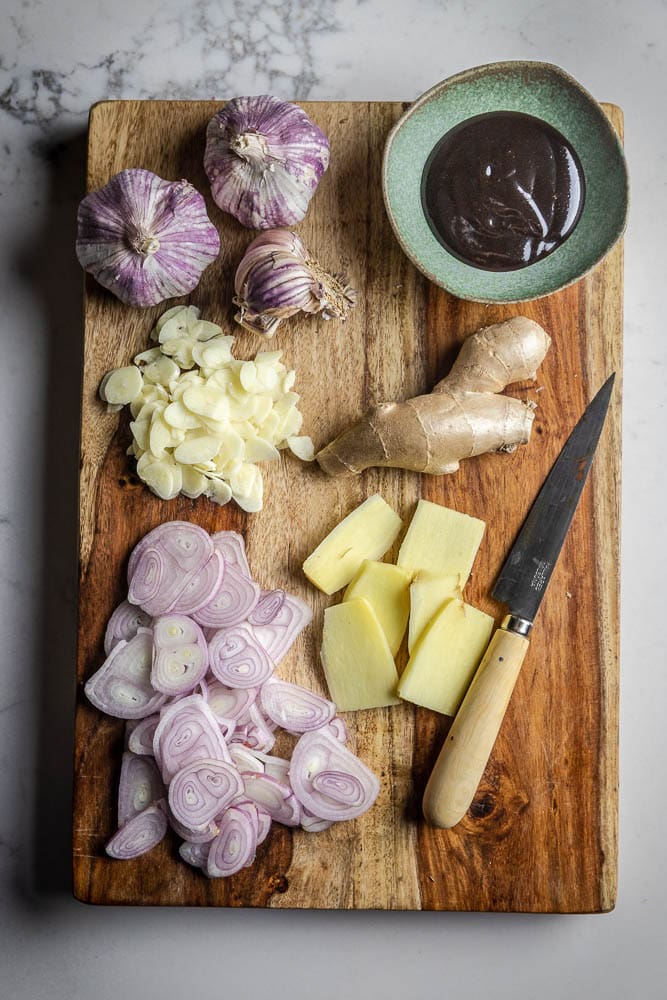
Garlic for the crispy topping, shallots, ginger and hoisin for seasoning the broth.
There are a lot of things we love about this soup but probably highest on the list is just how easy it is to make. Crisp up the garlic for the garnish, sauté some aromatics, poach the chicken in the broth and that’s pretty much it. On a cold winter night after a long hard day, this will be a treat for your tastebuds.
Start by cooking your rice noodles according to the package directions. We usually use vermicelli, which take only a few minutes in boiling water. Once the noodles are ready, rinse them in warm water to remove any excess starch and set them aside.
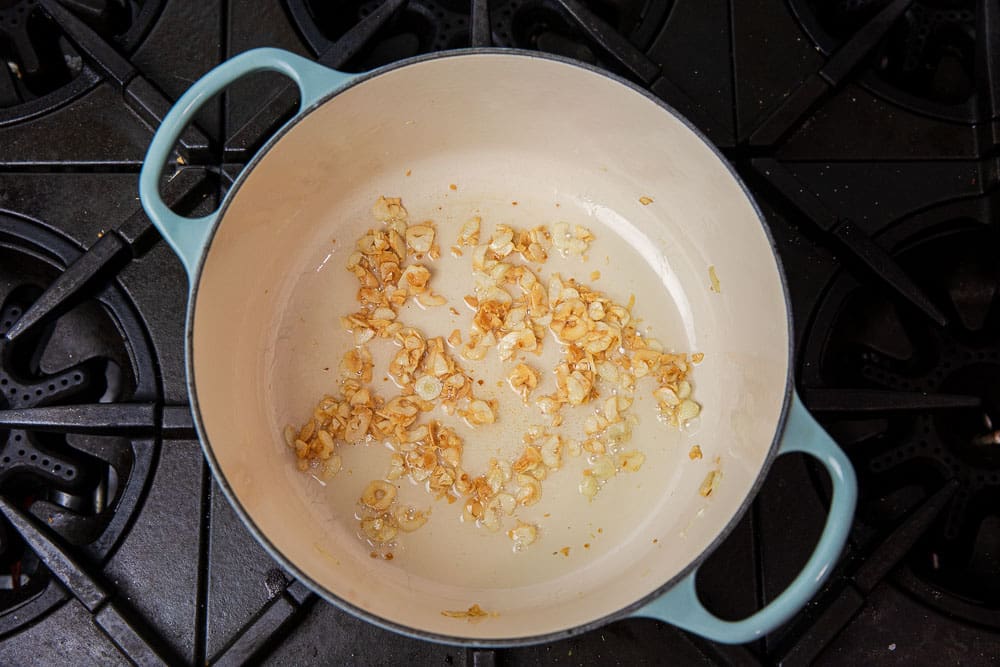
The crispy garlic only takes a a couple of minutes to turn perfectly golden brown.
You might be tempted to skip the crispy garlic topping but it’s worth the extra couple of minutes it takes. That bit of garlicky crunch on top of the hot broth is just so good. The trick to getting perfectly sweet, golden brown garlic chips (instead of bitter, coal black ones) is adding the oil and garlic to a cold pot. This gives the garlic a chance to bloom as the oil heats, slowing the browning process up a little. By the time the garlic is sizzling, it will just need a minute or two to turn golden. Keep the temperature on the low side and move the garlic around to keep it from scorching. Once it turns light brown, use a slotted spoon to remove it to a plate and set it aside. Leave as much garlic oil in the pot as you can.
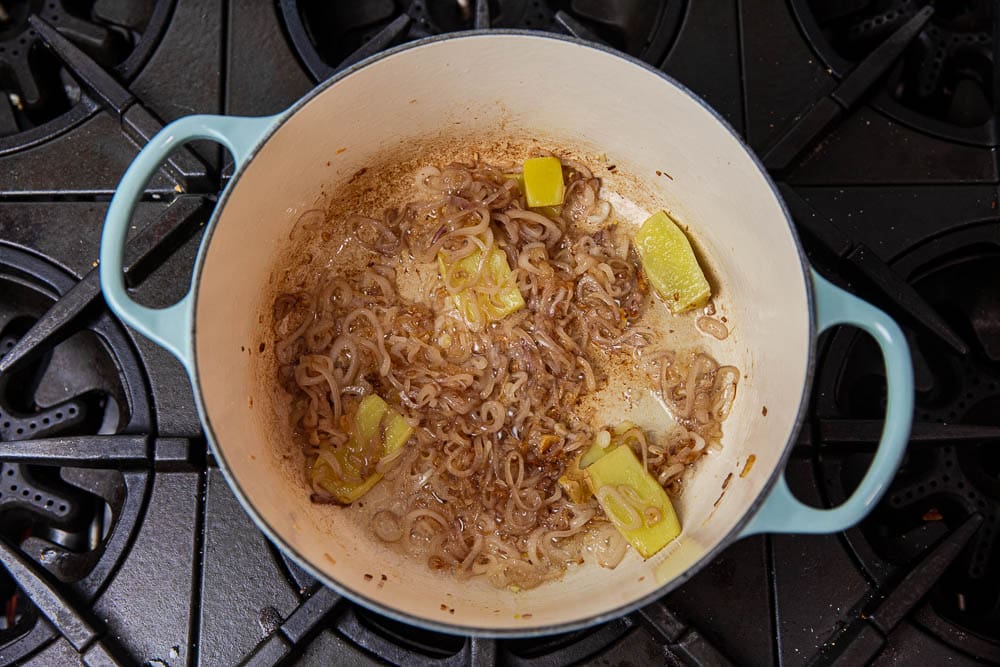
Cook the shallots with the ginger until they soften and turn golden.
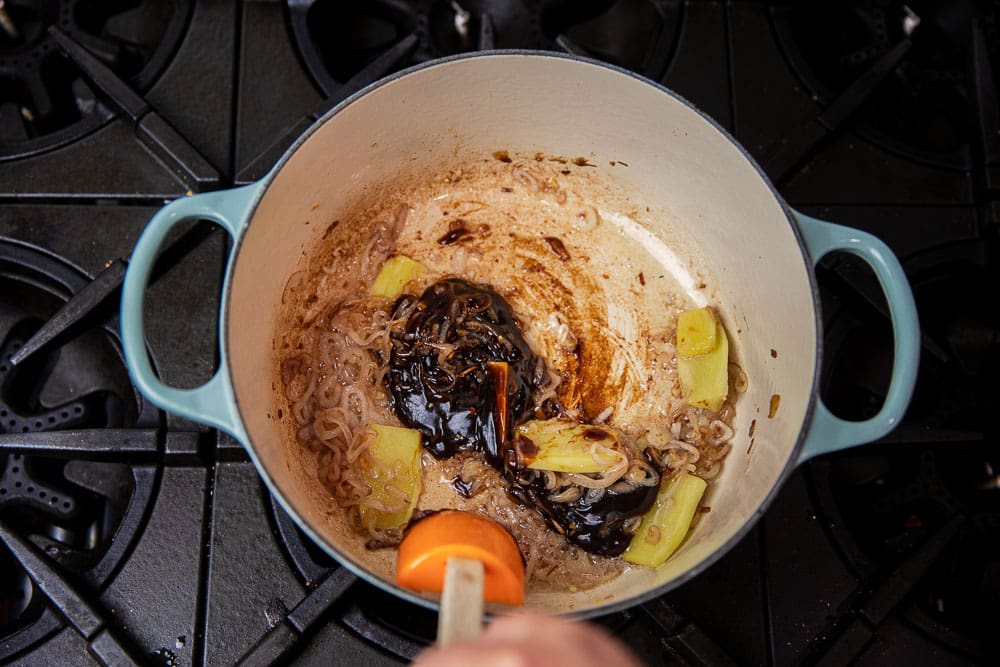
Add a little more oil, turn the heat up to medium and add in the sliced ginger and shallots. We love shallots for their mild, sweet flavor but if you don’t have them you could just as easily use the same amount of thinly sliced onions or leeks. Once the shallots are soft and beginning to turn golden, add the hoisin sauce and let it sizzle in the pot for just a minute to allow the flavors to bloom.
Let the hoisin sizzle in the pot for a bit before adding the liquids.
A quick aside about hoisin sauce: what is it exactly? Although hoisin is Chinese for “seafood”, the name most likely comes from the fact that the sauce is a common accompaniment for seafood. It actually doesn’t contain seafood or any meat at all. Often used as a glaze or dipping sauce for grilled meat, hoisin sauce is thick, dark and fragrant, balancing the saltiness from fermented black beans with sweetness and tang. Many brands of hoisin will be vegan and gluten free, but check the label of your brand to confirm if this is important to you. Refer to our Asian Pantry Basics page for more information.
Once the hoisin has sizzled, stir in the broth or water and turn the heat up to bring it up to a boil. Turn the heat down to maintain a bare simmer and add in the scallions whites and chicken pieces. You could use thighs (our choice, almost always), or breasts, bone-in or boneless, it really is up to you. If you have bone-in pieces but want to keep things lean, remove the chicken skin before poaching. You could also remove it after it’s cooked and if there’s too much fat on top (a little is tasty) you can remove any excess with a spoon.
Easy, warm and comforting.
Adjust the heat as needed to keep the broth at a simmer. You don’t want to boil the chicken or it can become tough. Let the chicken gently poach until it’s fully cooked through, the thickest part of the chicken should register about 160°F on an instant read thermometer. Boneless breasts will cook fastest, but also be most at risk of overcooking. Begin checking them after about 10 minutes. Small boneless thighs will also cook in about that time. Large, bone-in thighs may take up to 25 minutes, depending on their size. A benefit of poaching at a relatively low temperature is that it’s much more forgiving than a high-temperature sear, so a few minutes longer in the broth isn’t going to make or break your dinner.
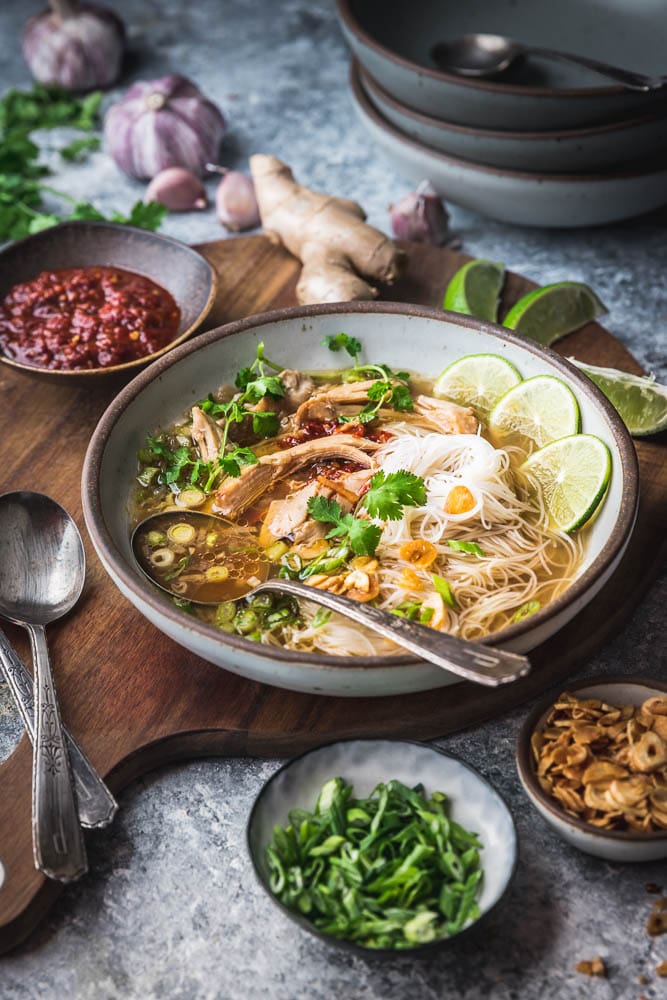
Bowl of Chicken Ginger Rice Noodle Soup on wood board with garnishes, chili sauce, ginger and garlic
Once the chicken is cooked through, use tongs to transfer it to a plate and use two forks to shred the meat, discarding the skin and bones, if there are any. You can use a spoon to remove any excess fat on top of the broth if there is any. Return the chicken to the pot, stir in the sesame oil and scallion greens. Taste the broth and add any salt or soy sauce if you think it needs it. We used homemade low sodium broth and added about a teaspoon of kosher salt and a tablespoon of light (not low sodium) soy sauce. If the soup has cooled, turn the heat back on to medium and bring it back to a simmer before serving.
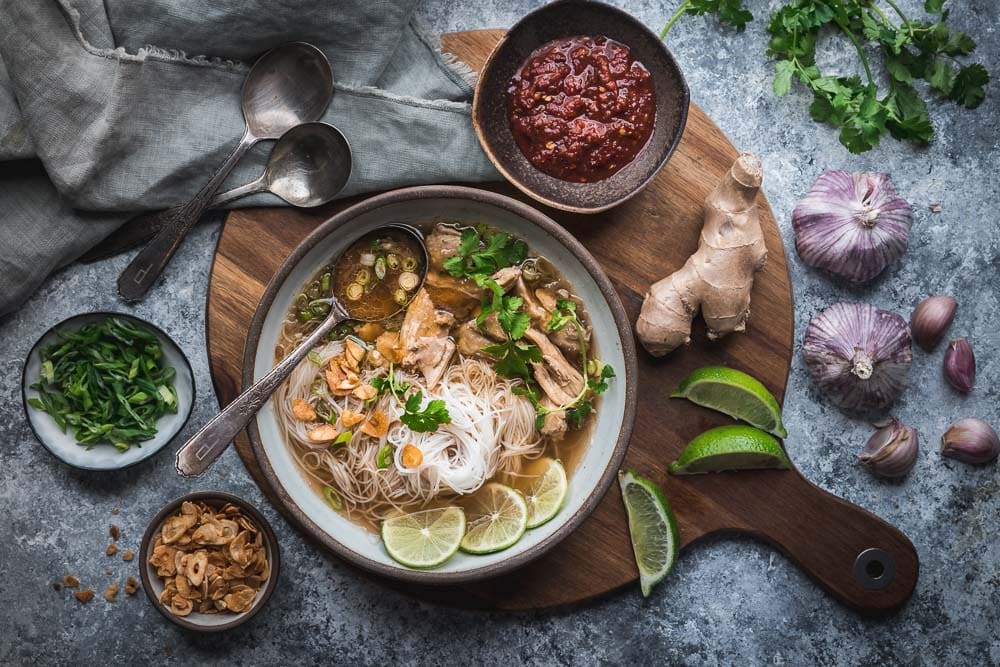
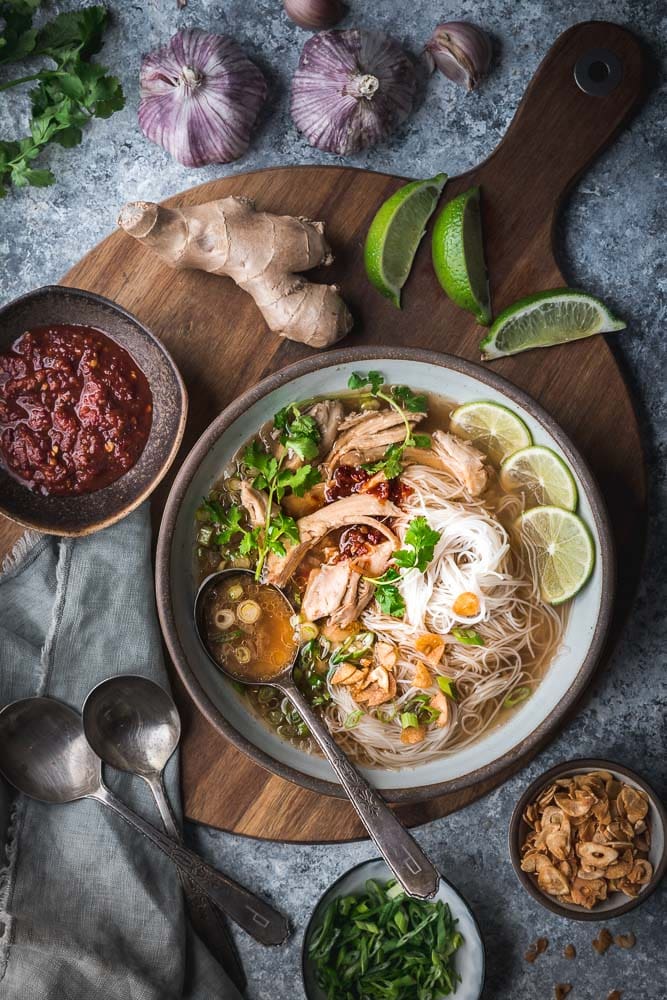
Divide the noodles into four soup bowls and spoon the hot broth and chicken over the top which will warm the noodles back up. Top each serving of chicken and rice noodle soup with some crispy garlic chips and torn cilantro leaves. Serve it with lime wedges for squeezing, and chili-garlic paste (or our newest obsession, Chili Crisp) on the side for your spice fiends.
Add a little spicy chili crisp on top
Gingery Chicken and Rice Noodle Soup with Crispy Garlic
Take chicken soup, and give it a healthy thump of warming ginger, add caramelized shallots, a bit of hoisin and serve with a squeeze of lime, a sprinkle of cilantro leaf, and some crispy toasted garlic chips. Gingery Chicken and rice noodle soup is like a big hug from an old friend.
3 tablespoons neutral oil (divided)
5 large garlic cloves (thinly sliced)
3 large shallots (peeled and thinly sliced)
3- inch piece ginger (peeled and thinly sliced into planks)
1/4 cup hoisin sauce
2 quarts low sodium chicken stock or water
2 pounds chicken thighs or breasts (boneless or bone-in, skin removed, if desired)
4 scallions (thinly sliced, white and green parts separated)
2 teaspoons toasted sesame oil
8 ounces rice noodles (recommended: vermicelli)
Kosher salt and soy sauce (to taste)
Optional garnishes
1 lightly packed cup fresh cilantro (torn)
1 lime (quartered, for squeezing)
Chili-garlic paste or chili crisp
Cook your rice noodles according to the package directions. Rinse them with warm water and set them aside.
Add 2 tablespoons of the oil and the garlic to a large pot and turn the heat on medium-low. Keep moving the garlic around as it starts to sizzle, turning it often until it turns light golden brown, about 2 to 3 minutes once the oil is hot. Remove it to a plate with a slotted spoon and set it aside.
Turn the heat to medium, add the last tablespoon of oil to the pot and add the shallots and ginger. Cook, stirring often, until the shallots are soft and lightly browned in spots, about 5 minutes. Add the hoisin and cook it for about 1 minute. Add the stock or water and bring it to a boil, then turn the heat down to a simmer, add the chicken pieces and scallion whites and cook until chicken is cooked through and tender. The thickest part of the chicken should register about 160°F on an instant read thermometer. Boneless breasts may take about 10 to 15 minutes, large bone-in thighs may need 25 to 30 minutes. Turn the heat off, remove the chicken to a plate and use two forks to shred the meat, discarding the skin and bones if needed. If there is a layer of fat on top of the broth, you can remove it with a spoon, if desired. Remove and discard the ginger, return the shredded chicken to the pot and stir in the sesame oil and scallion greens. Taste the broth and season it with salt and/or soy sauce, if desired (the amount will depend on the saltiness of the broth used). If the soup has cooled, heat it on medium until it returns to a simmer before serving.
To serve, divide the noodles into four soup bowls and ladle in the hot broth and chicken. Top each serving with some crispy garlic and torn cilantro. Serve with lime wedges for squeezing and some spicy chili-garlic paste on the side.
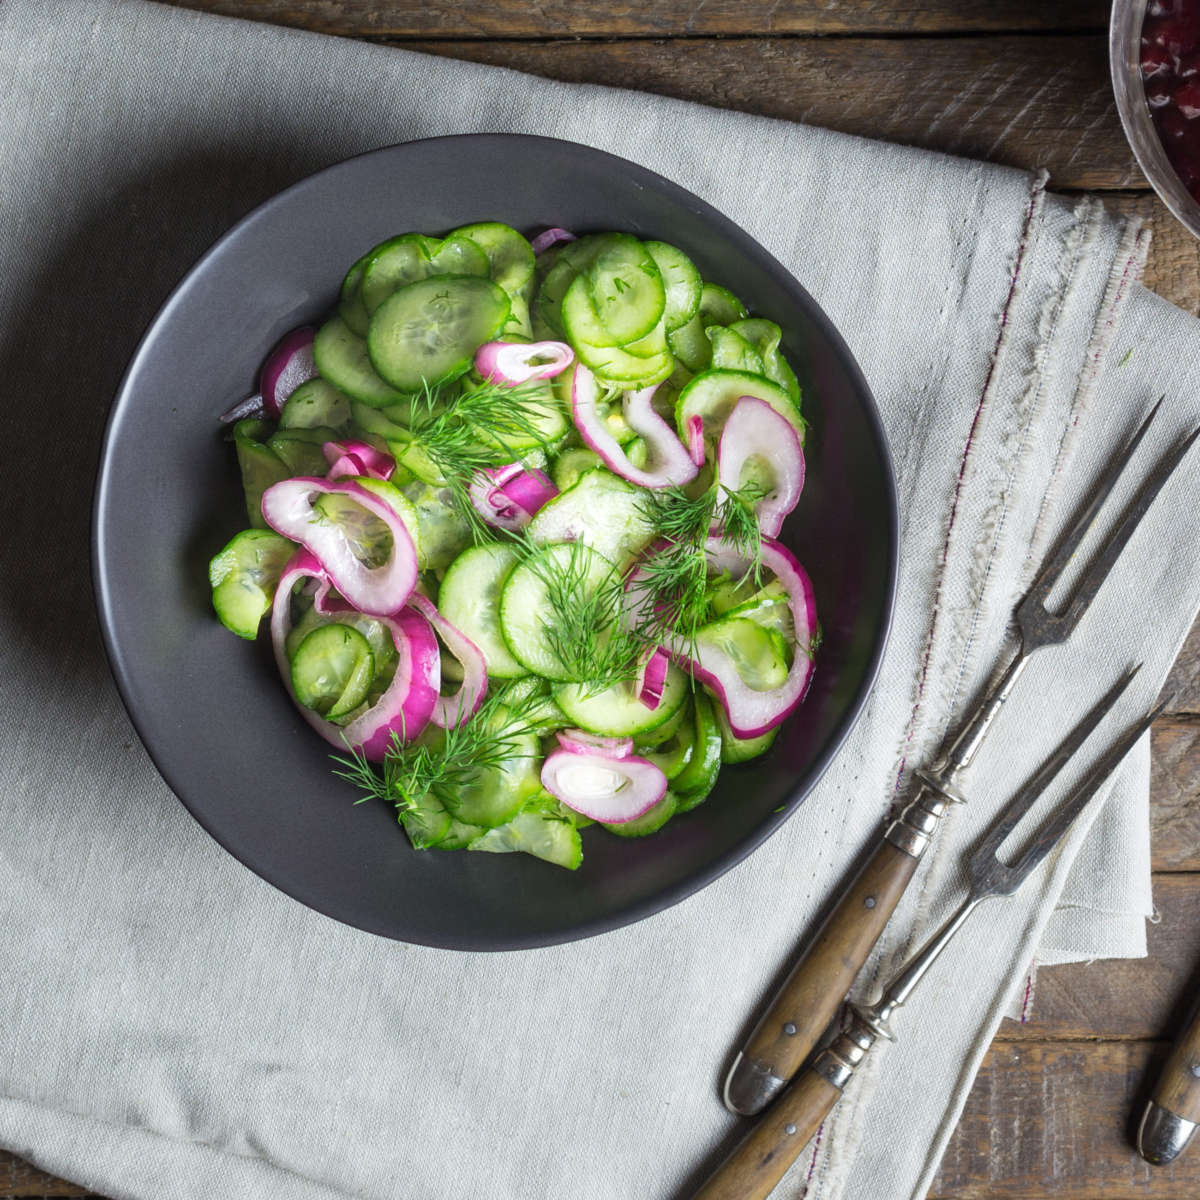
Swedish Cucumber with Dill is fresh, light and full of sweet, tart flavor. We added quick pickled red onions to ours for color and flavor. Make it alongside Swedish meatballs, or anytime you need a quick, delicious salad.
Cucumbers are one of our favorite vegetables and we make some form of quick pickles at least once a week, if not more. I love them Asian-style, with rice vinegar and toasted sesame oil, especially along with Vietnamese-style Baked Chicken or any roasted meat.
When we decided to make Swedish Meatballs, I knew we had to also make the traditional side dish, a sweet and sour quick-pickled Swedish cucumber salad flavored with dill. We added red onions, because they add great flavor and color to the dish. If onions are not your thing, feel free to leave them out and just serve the cucumbers on their own. (more…)
Is it possible for a cookie made without butter or flour to be the most delicious cookie we’ve ever tasted? The answer is a resounding YES. With only 3 essential ingredients: peanut butter, eggs and brown sugar, these cookies are practically a miracle. Crisp on the edges, gooey in the middle, with real peanut buttery flavor. Adding vanilla, chocolate chips and coarse sea salt just makes a good thing even better.
Hello, friends. We just posted a potted history of our kitchen renovation, in which we mentioned that we’d baked a fresh batch of peanut butter and chocolate chip cookies. Well, here they are. We think we speak for most of us when we say, can we please have a treat now? We’ve been very good, and we’re very tired of being at home and we just want something tasty and fun to have with a cup of tea (a.k.a. bourbon, straight, no rocks).
We have no Flour!
Oh and also, we don’t have any flour because there’s none left in North America — you know, since it’s now mandated that everyone make homemade sourdough bread at the exact same time. And we also don’t have any more butter because we used it up buttering all that sourdough bread. But we can still make cookies, right? RIGHT?
Yes, we can. Excellent ones, in fact. These are based on Smitten Kitchen’s three-ingredient peanut butter cookies and we haven’t done much to change them. We up the amount of vanilla, and add in some chocolate chips (a mix of white and dark because it’s a pandemic and we just want to be safe). These are the perfect gluten free base to add whatever wackiness you like in your cookies. Nuts? Yes! Butterscotch chips? Great idea! Tiny marshmallows? No idea, but try it and let us know!
What I love about these (aside from their overall deliciousness, of course) is how easy they are to whip up. As you may have read, our kitchen is a full on disaster zone so even finding a hand mixer in all the chaos is a chore. But these are simple enough to whip up with just a big bowl and a wooden spoon. (We keep an eye on the spoon by tying it around Matt’s neck). The one other thing I did find is our kitchen scale, which makes me happy because weighing ingredients is so much easier (and more precise) than measuring them.
Making the Cookies
To make the cookies, add the sugar (I prefer dark brown sugar in this recipe, but light brown is fine too) to a mixing bowl with the eggs and vanilla. All the ingredients, except perhaps your eggs, should already be at room temperature, which makes mixing everything much easier, especially if you’re doing it by hand. Once there are no more lumps of sugar, add in the peanut butter and mix it until it’s all amalgamated and you can’t see any streaks of peanut butter. It will turn pretty thick but just keep working it in. Then add the chocolate chips or any other additions and mix them in well.
I like to chill the dough for about 30 minutes before scooping them so the cookies keep their shape better in the oven. Use a #40 (1 3/4 tablespoon) scoop, or estimate about 2 tablespoons with a spoon and place them onto a lined cookie sheet (we fit about 12 to a sheet). Before baking, we sprinkle a little flaked sea salt on top of each dough ball, and push it gently down with a finger so it sticks.
These won’t need to bake long, about 10 to 14 minutes should do it. If you have a convection oven, turn on the fan and reduce cooking time a couple of minutes. You want them lightly golden at the edges but still soft in the middle. Since the baking time is so short, do make sure you give them a good amount of time on the tray or a cooling rack once they come out of the oven.
Now all we have to do is figure out where to store the cookies in this God-forsaken kitchen. I know, we’ll tie them in a box around Matt’s neck. What could possibly go wrong?
Salted Chocolate Chip Peanut Butter Cookies
1 3/4 cups 335 grams packed dark or light brown sugar
Preheat the oven to 350°F. Line a rimmed baking sheet with parchment paper or a silicone baking mat.
In a medium bowl, whisk together the brown sugar, eggs and vanilla until combined. Whisk in the peanut butter until the dough is smooth and the peanut butter is completely incorporated. Stir in the chocolate chips and then chill the dough in the refrigerator for 30 minutes, or up to 2 days.
Scoop or spoon the dough into 2 tablespoon-sized balls and place them on the prepared pan. Sprinkle the dough balls lightly with coarse-grained sea salt just before baking. Bake the cookies for 10 to 14 minutes, until light golden brown on the edges. Let them sit on the sheet for a minute or two before transferring them to to a cooling rack.
Do ahead: You can definitely make the dough in advance and either refrigerate it for up to 2 days or scoop them into balls, freeze them and store the frozen balls in an airtight freezer bag for up to 3 months. You can bake them from frozen, for 15 – 18 minutes, in a 350ºF oven.
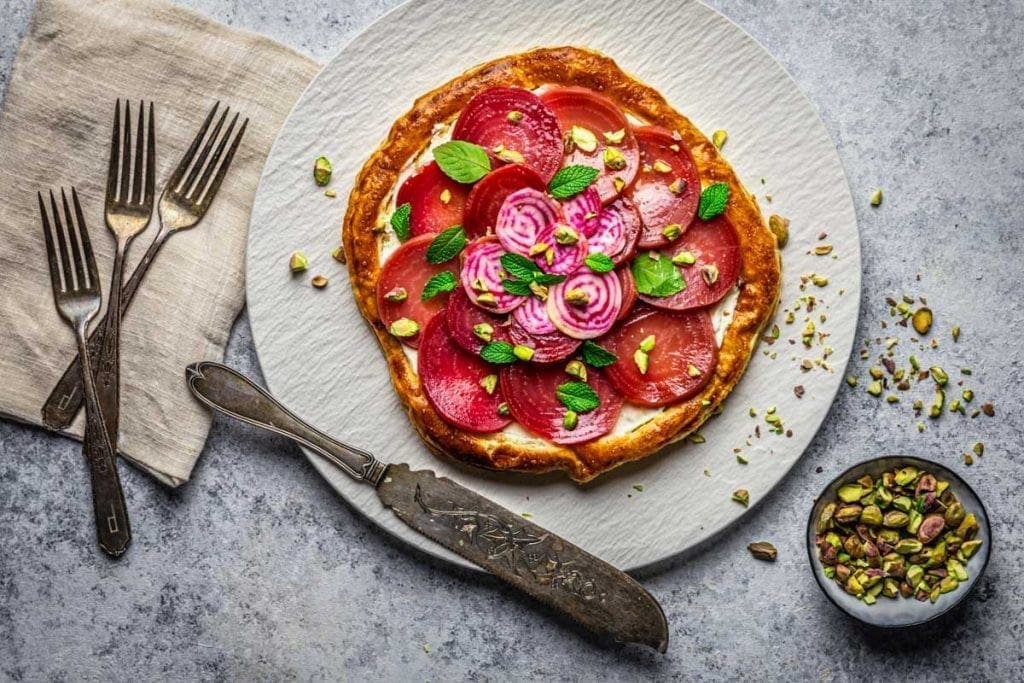
This simple, elegant tart has a layer of creamy whipped feta cheese topped with lightly marinated roasted beets. A puff pastry shell makes it a breeze to prepare, while a scattering of fresh mint and crunchy pistachios adds crunch and freshness.
We’ve been finishing up a few projects here at Nerds with Knives, which is why you might not have seen a new post from us for (checks watch) six to eight weeks. One of those projects is, we’re thrilled to announce, our new cookbook, Cork and Knife, which will be published in six days! You can follow the link to read all about it and pre-order. Please check it out!
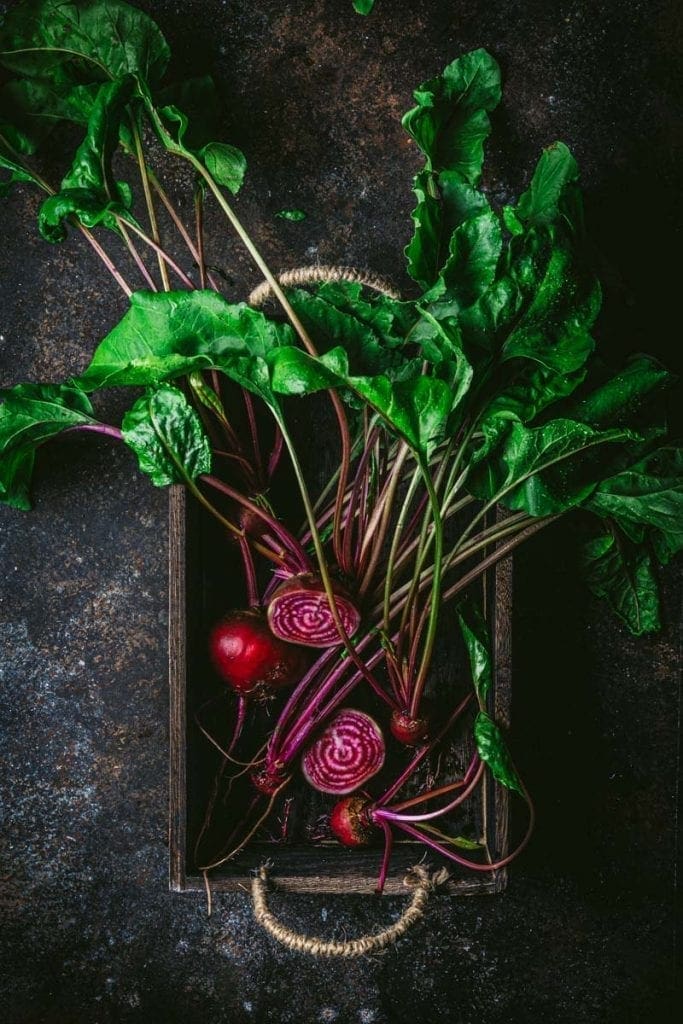
In the meantime, our summer garden has been producing some delicious harvests, and this week we’d like to talk about our beets (that’s beetroots to you in the U.K.). There’s a reason why beet and goat cheese salads have been ubiquitous on menus for as long as we’ve had menus to peruse: it’s a fantastic combination. But like any classic pairing, the devil is in the details. I adore beets, but they often need a little coaxing to bring out their best flavor. They are referred to as having an “earthy” flavor by those who love them, and “like dirt” by those who don’t. That earthiness, which is found in many root vegetables like carrots and potatoes, is produced by a compound called geosmin.
(Nerd note: geosmin is also found in one of my favorite scents, and favorite words, petrichor – the smell of the earth when it just starts to rain.) Acids break down geosmin, which is why beets are often paired with a tart vinaigrette. Tart cheeses, like chèvre, feta and some blues are a tasty foil to that sweet earthiness.
Chioggia beets minutes after being pulled from the garden.
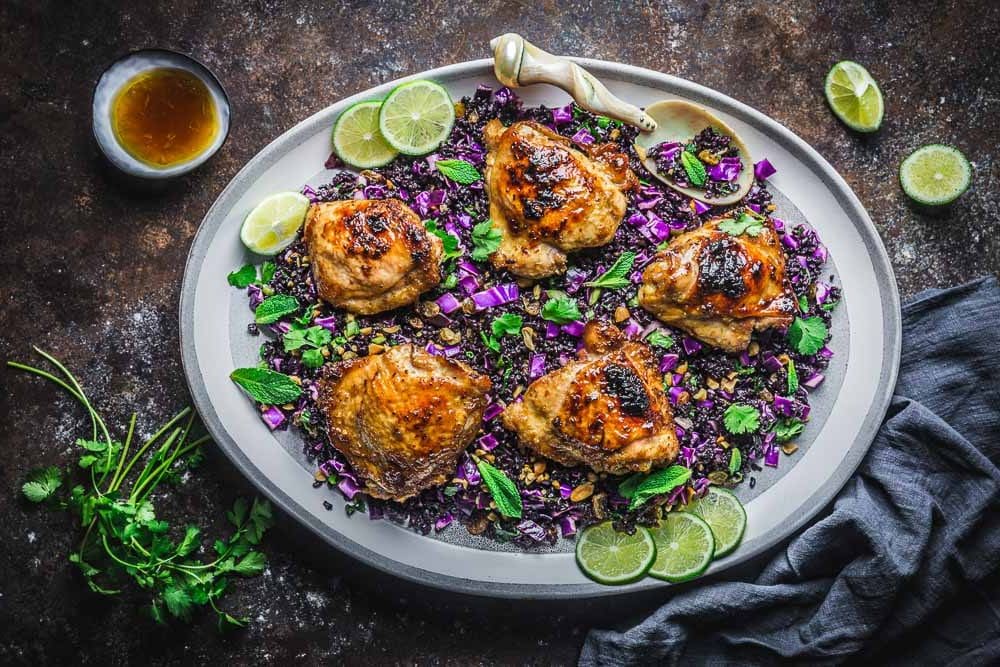
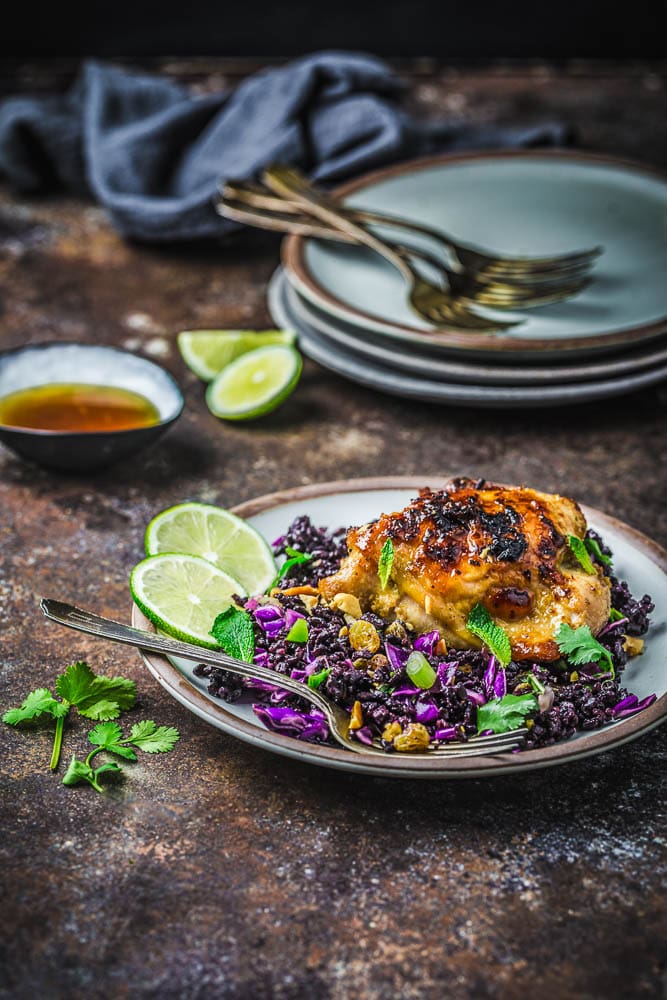
Glazed, roasted chicken on Black Rice and Red Cabbage Salad
The lemongrass chicken recipe is adapted from this one from Thomasina Miers via the Guardian and as soon as I saw it, I knew I wanted to try my spin on it. Black rice (also called forbidden rice) is one of our favorite grains. We use it in this delicious Black Rice Salad with Red Cabbage and Herbs. We also use it in Creamy Mushroom Soup because it has great texture, perfect for soups and salads.
The chicken is just as simple as can be. Everything for the marinade gets chucked into the food processor and blitzed. The main flavor agent here is fresh lemongrass which, even here in the Hudson Valley has become really easy to find (if you’re local, take a look at our new Beacon and Hudson Valley Recommendations Guide to find our favorite places to eat and shop). Lemongrass is usually stocked with the fresh herbs, often bundled as 3 or 4 stalks in a bunch. It’s a fantastic flavor, lemony obviously, but also kind of floral and herbal. One of our favorite ways to use it is to infuse it in vodka and then make Lemongrass Collins Cocktails (inspired by our brilliant friend, Jesse Halpert. Hi Jesse!)
About lemongrass
When you buy lemongrass, look for firm, pale-green stalks with thick bulbous bottoms (meow). The thinner tops may be a little dry but shouldn’t be shriveled or yellow. Though lemongrass stalks are often about a foot long, almost all of the flavor is in the bottom 4 or 5 inches of the stalk. Trim off the thinner top portion and the bottom of the woody base. Then peel away any tough outer layers to get to the more tender part of the stalk. (You can use all the scraps to make lemongrass tea; steep them in simmering water for 5 minutes, then strain.). Once the stalks are trimmed, slice them into thinnish rounds. They’re going into the food processor anyway, but it’s best to give them a head start.
Note: if you can’t find lemongrass, our Vietnamese-Style Baked Chicken uses a similar blend of flavors as lemongrass chicken, but without the actual lemongrass.
Making the Marinade and Cooking the Chicken
Add the other marinade ingredients to the food processor and give it a whir for about a minute or so, until the garlic and lemongrass are minced. Add the chicken to a gallon-sized sealable bag (or a glass bowl) and pour over the marinade. Smush the chicken around to make sure each piece is well-coated then seal the bag (or cover the bowl with plastic wrap). Refrigerate the chicken for at least 2 hours, though overnight is best. Turn the bag around every so often so it marinates evenly.
When you’re ready to cook, preheat the oven to 425ºF/220ºC, line a rimmed baking tray with foil and set a rack on top of it. Bake the chicken until it’s fully cooked through (about 165ºF/75ºC on an instant-read thermometer). It should take about 25 to 35 minutes, depending on the size of the pieces. If you’re using breasts, start checking for doneness after 20 minutes. If the skin isn’t as brown as you’d like it, set the tray under the broiler for just a minute or two. Make sure to let the chicken rest for at least five minutes before serving.
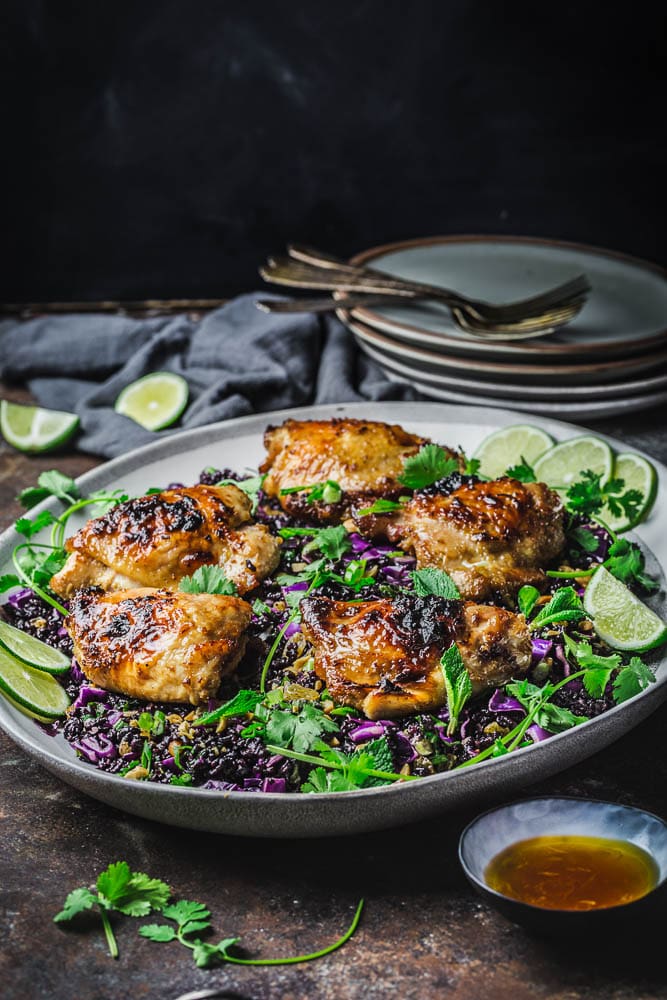
Sticky Lemongrass Chicken Thighs are marinated in our favorite Thai flavors, then roasted until golden brown and delicious. We serve them on top of a beautiful, healthy Black Rice Salad, studded with crunchy red cabbage and loaded with fresh herbs. This chicken will stick right to your favorites list.
For the marinade:
3 lemongrass stalks
5 garlic cloves
Finely grated zest and juice from 1 lime (about 2 tablespoons juice, 1 teaspoon zest)
3 tablespoons fish sauce
2 tablespoons soy sauce
2 tablespoons palm sugar or brown sugar
2 tablespoons neutral oil
6 bone-in, skin-on chicken thighs
Cut off and discard the very bottom and dry tops of the lemongrass, leaving the thick part in the middle. Peel away and discard the dry outer layers and slice what’s left of the middle into thin rounds. Add the sliced lemongrass, along with the rest of the marinade ingredients, into the bowl of a food processor and pulse until a fine paste forms, about 15 to 20 pulses. Add the chicken to a sealable plastic bag or a glass bowl, and pour over the marinade. Mix everything around until the chicken is thoroughly coated. Seal the bag (or cover the bowl) and refrigerate for at least 2 hours or up to overnight.
When ready to cook, preheat the oven to 425ºF and set a rack in the middle. Line a baking tray with foil and place a wire rack on top.
Lay the chicken, skin-side up, onto the baking tray rack (reserving the marinade) and bake until the chicken is cooked through and the skin is golden and crisp, 30 to 35 minutes (temperature should read about 160ºF on an instant read thermometer). Brush the skin with the reserved marinade halfway through. If you want the skin darker, set the rack under the broiler for a minute or two. Take the chicken out and leave it to rest for at least five minutes.
Serve, with Black Rice Salad (or steamed rice) with extra dressing on the side for drizzling.