
Icebox cakes aren’t something I grew up with and, to be honest, I thought of them as one of those “convenient” foods from the past that were usually quite terrible, like TV dinners and jello salad. I was wrong. They’re actually great … if you make them right. An icebox cake needs to be sweet, but not too sweet. Tender, but not soggy. And it has to actually have flavor.
If you’re not familiar with them, icebox cakes originated in the United States in the 1920s, as electric food cooling became more accessible to middle class households. The dessert, which requires no baking, is made by layering cookies or crackers with sweetened whipped cream, which softens the cookies into a cake-like consistency as it cools in your icebox … or, as we call it now, the refrigerator.
This spring we had the pleasure of hosting two large feasts in two days. Matt’s sister and her daughter were visiting from France. Matt’s brother and sister-in-law came up from Alabama, and our closest friends in Beacon were joining us as well.
We celebrated Passover one night, and had an Easter lunch the next day. It seemed like a great idea at the time, and it was a lot of fun. But it was also a lot of cooking. Passover dinner was Spicy Korean Brisket, smashed garlic potatoes, and string beans with lemon and soy sauce. Then the next day we made an Easter ham with cornbread pudding, biscuits and sides.
The whole point of this humble-brag is that we needed to make two great desserts that both the adults and kids would love, but they both had to be quick, relatively easy, and made at least a day ahead. Key Lime Pie was an obvious pick, but how to top it the next day?
That’s when I stumbled on to this Ina Garten (aka: Barefoot Contessa) recipe for Mocha Icebox Cake. Ina’s recipes are some of the most reliable out there in my opinion. She rarely steers me wrong, and this cake was no exception.
But, here’s where we changed things up a little bit: One, the original recipe is very expensive. (Three full bags of Tate’s cookies at around $7 a pop, plus 16oz of mascarpone cheese. In this economy.) And it was also a bit too sweet for our taste. So we adapted the recipe to use only one bag of Tate’s (or any thin, crisp chocolate chip cookie), and for the rest of the cookie layers, we used chocolate Maria wafer cookies*. These are much less expensive, and also happen to be less sweet and rich. The mascarpone is plenty rich enough, without so many of the buttery Tate’s cookies.
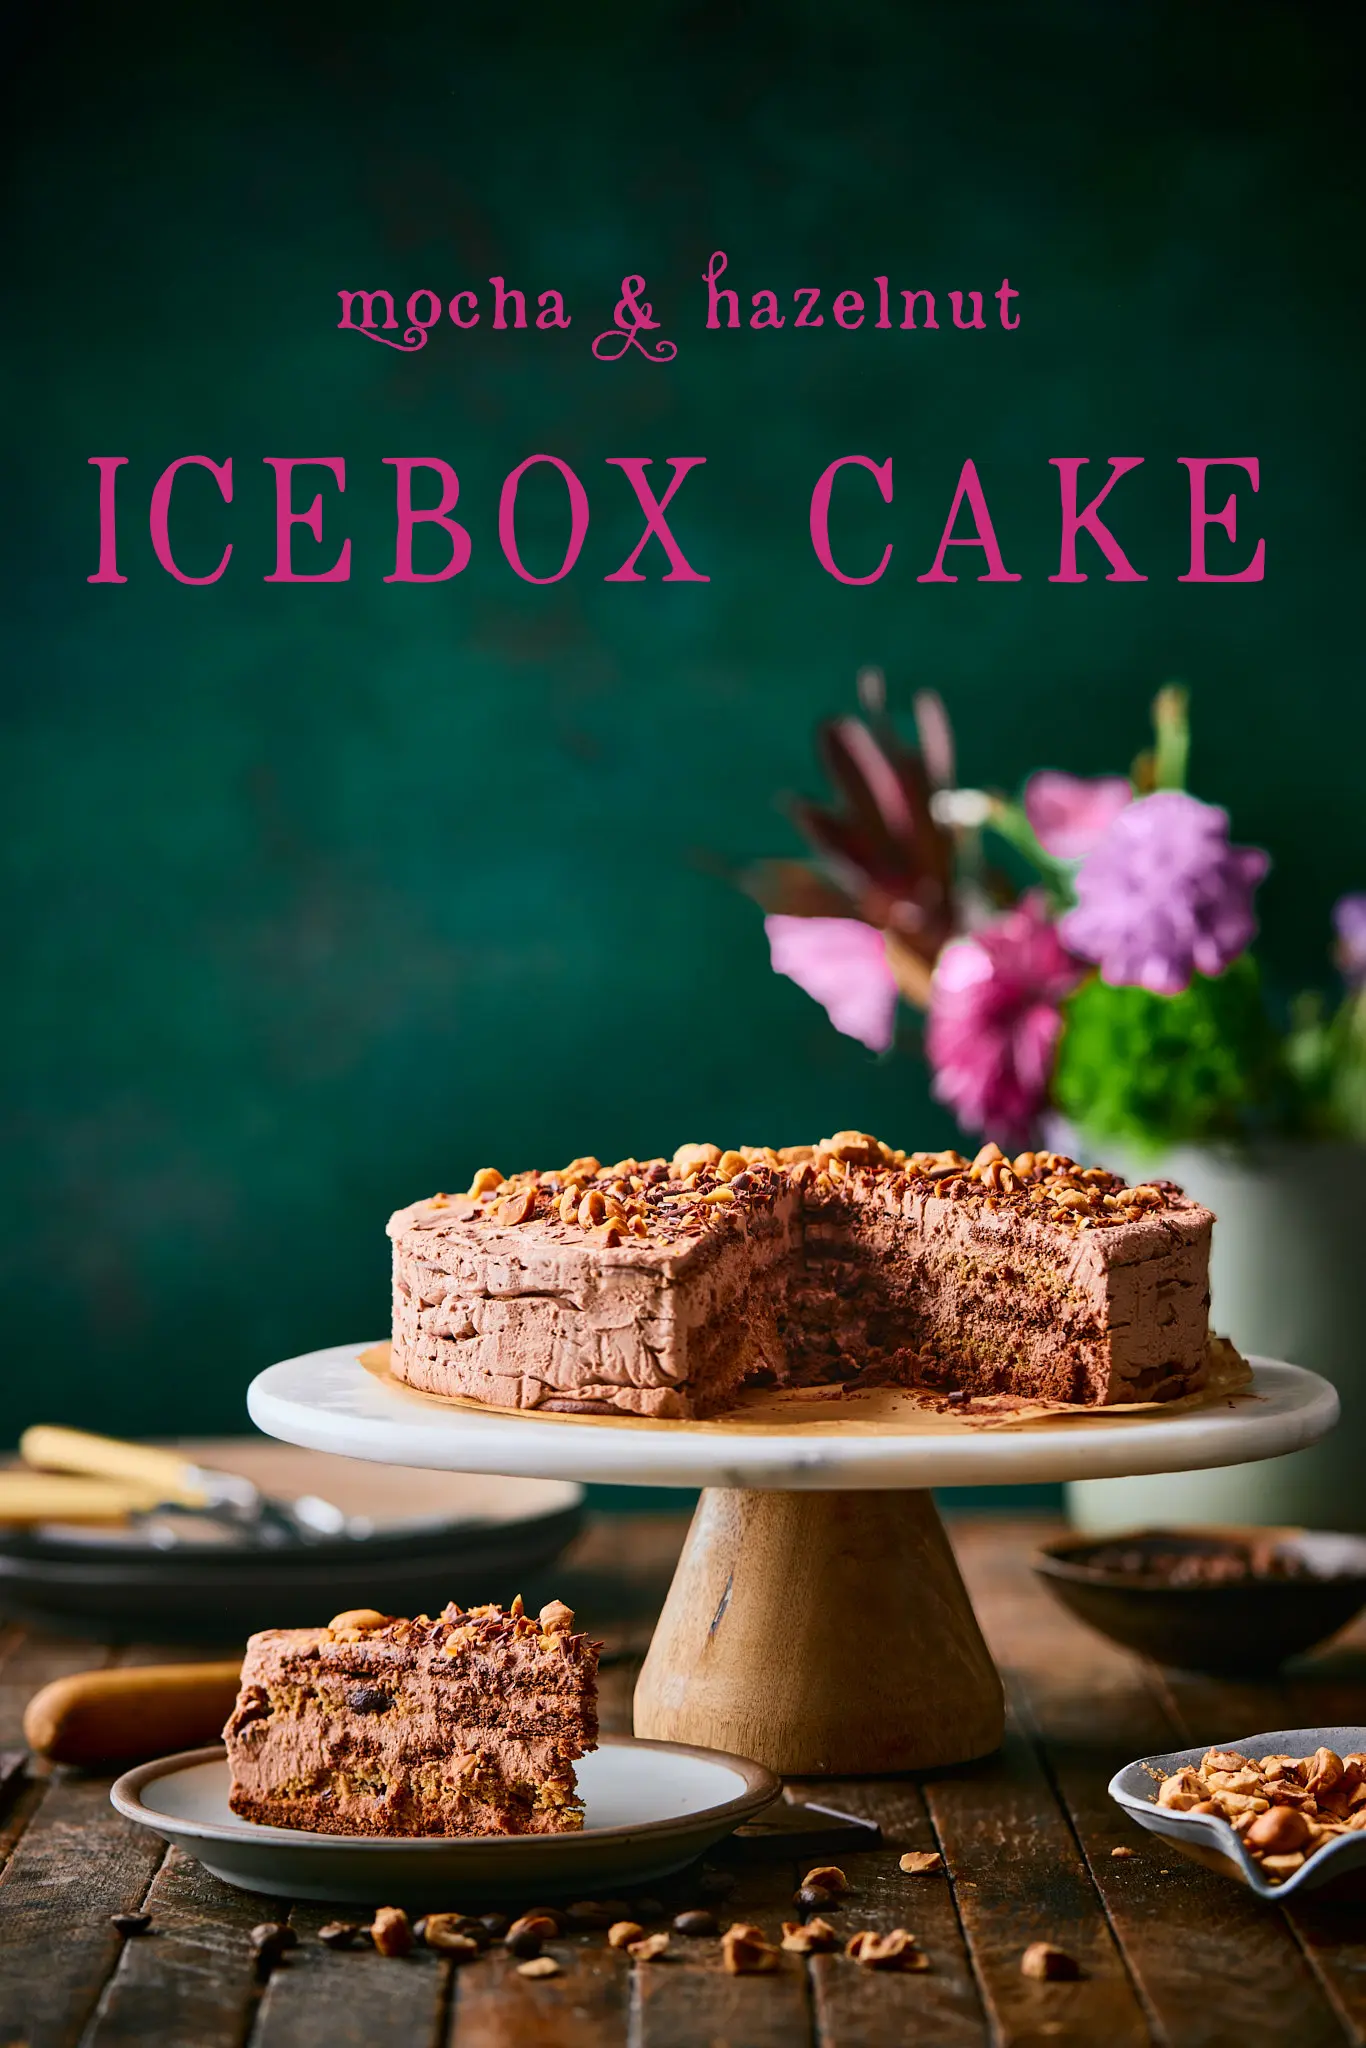
We also wanted to add a bit of nutty crunch to complement the soft, silky cream, so we added a topping of crushed toasted hazelnuts along with curls of shaved chocolate. To further that nutty flavor, we used hazelnut Frangelico liqueur instead of coffee-flavored Kahlua.
Note: this icebox cake does not taste boozy at all, but if you want to avoid the alcohol, you could use a hazelnut syrup or just omit it. (Conversely, if you like boozy desserts, go buy our book Cork and Knife!)
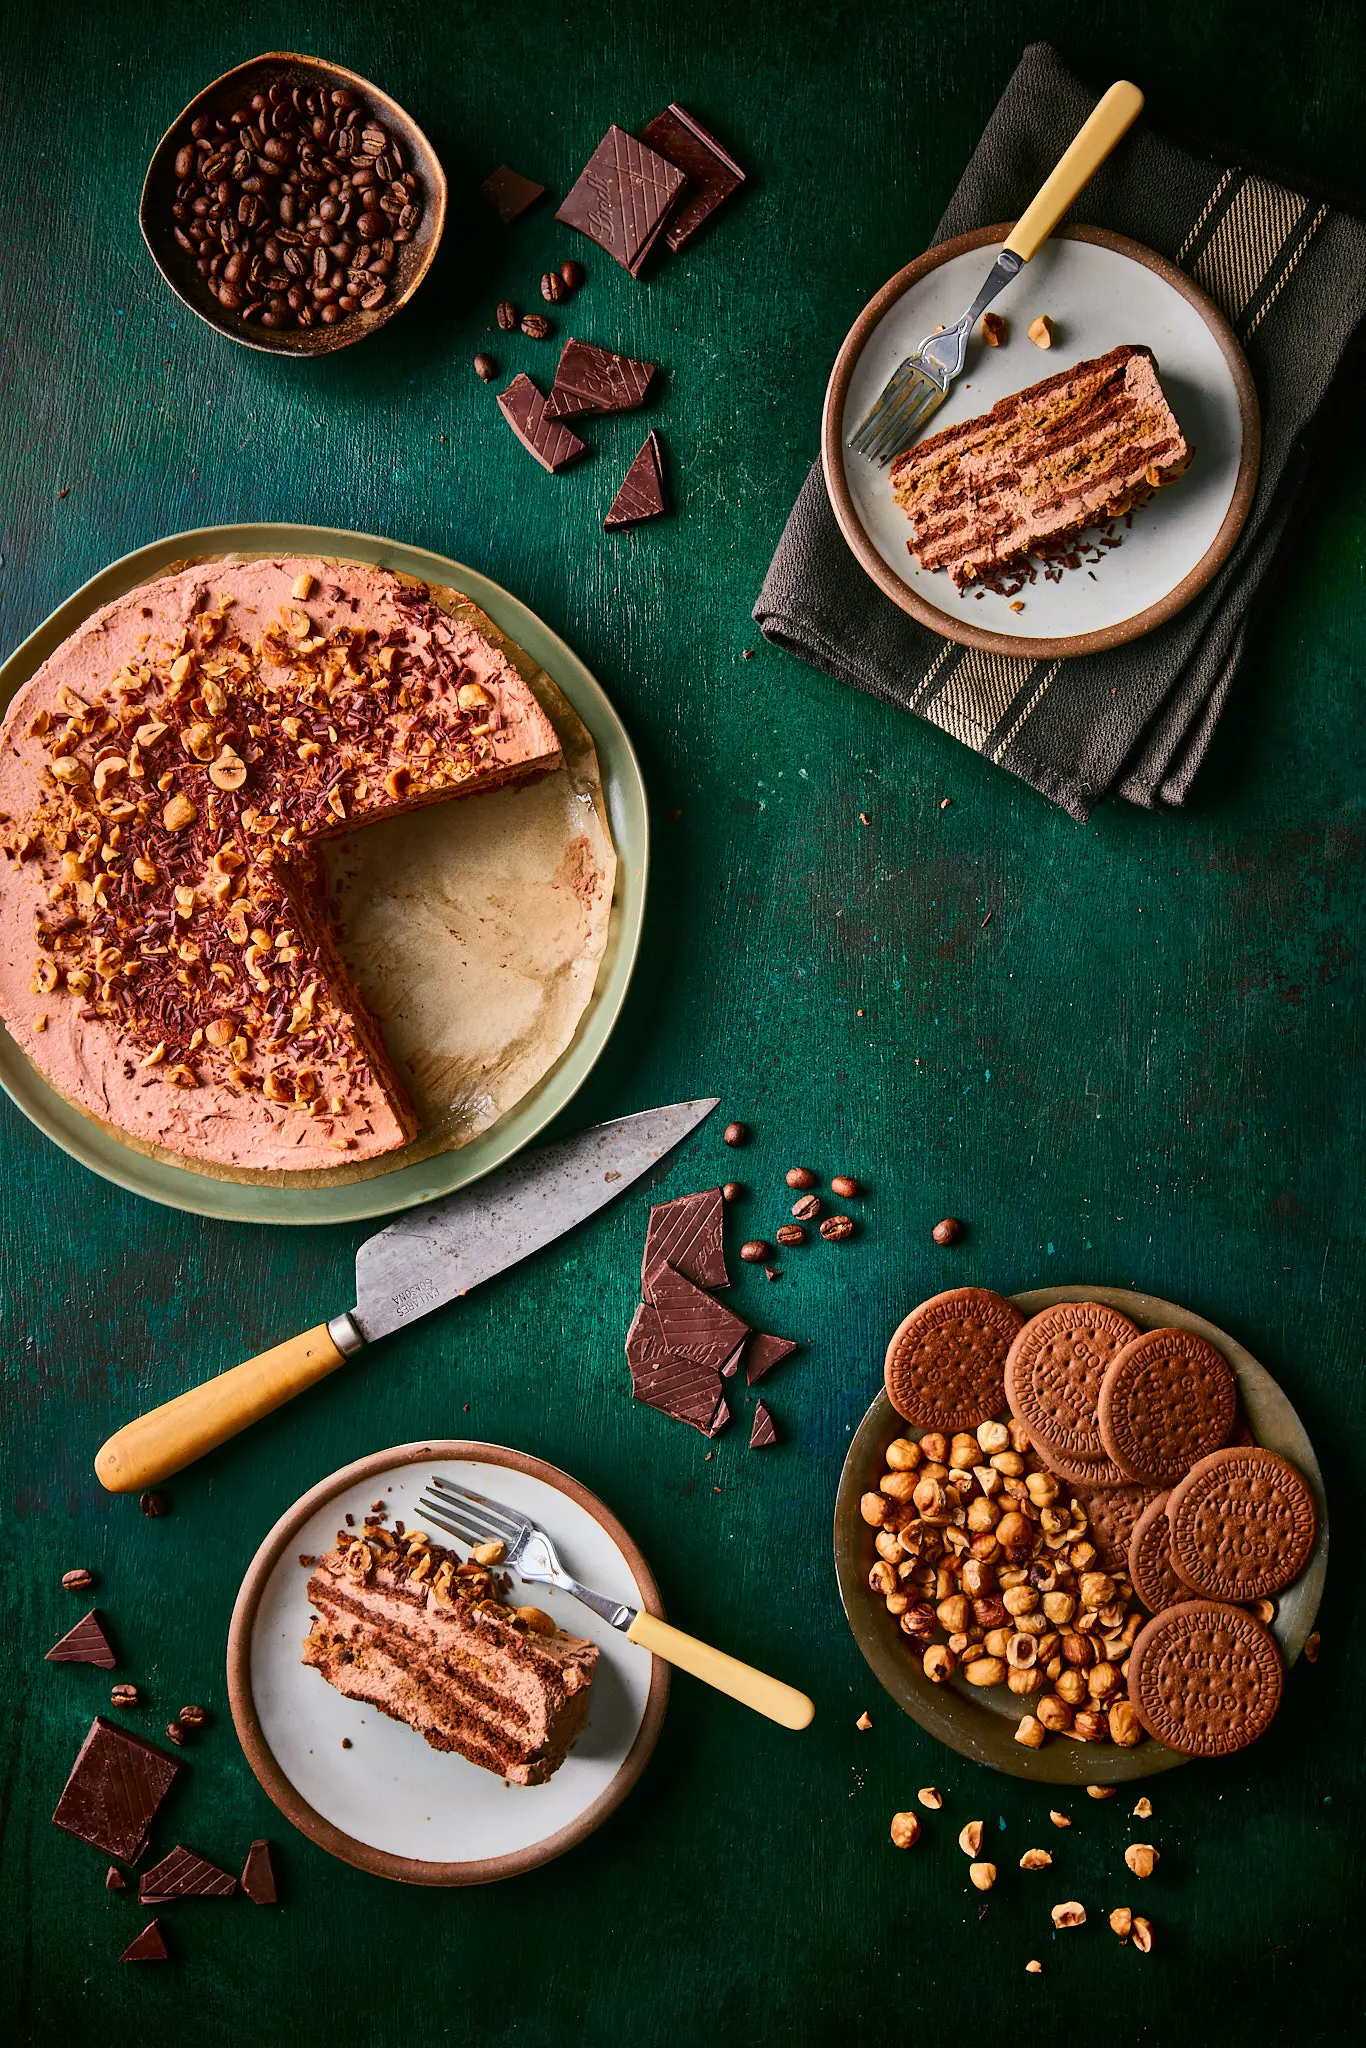
*The Nabisco chocolate wafer cookie used in many traditional icebox recipes was discontinued a few years ago. We found that Goya’s Chocolate Maria Cookies made a pretty good substitute. But you could use any thin cookie you want.
how to make an icebox cake
The process is really simple. If you want to serve the cake on a plate, line a 9-inch springform pan with parchment or plastic wrap. This will make it easy to remove. You could also make it in a 9-inch ceramic or metal baking dish, and serve it out of that.
Make sure both the cream and mascarpone are cold, straight out of the refrigerator. Unlike cream cheese, mascarpone has a tendency to separate if it gets warm, so keeping it cold helps to avoid that.
Add the mascarpone to the bowl of a stand mixer fitted with the whisk attachment (or use an electric beater and a large bowl). Turn the mixer on low and soften the mascarpone a bit. Add a little bit of cream, a couple of tablespoons at first, and whisk on low until combined and smooth. Add a little more cream and keep mixing on low, scraping down the sides and bottom of the bowl as needed. This helps make the cream mixture perfectly smooth, without any little bits of mascarpone. Once the mixture is thinned a bit, you can add the rest of the cream all at once and continue to whisk on low until it’s all combined.
With the mixer still on low, add in the sugar, hazelnut liqueur, cocoa powder, espresso powder, vanilla and salt. Mix until it’s combined and then slowly raise the speed, and whip it until firm peaks form, about 3 minutes. Be careful not to over-whip. You want it thick and spreadable.
If you’re working in a hot kitchen and it seems like the mixture is getting a bit warm, pop it in the refrigerator and chill it for about 20 minutes or so. You could also make it up to a day ahead and keep it cold in the refrigerator. When you’re ready to use it, take it out of the fridge and whisk it for a minute to loosen it before spreading.
if you want even layers, use a scale
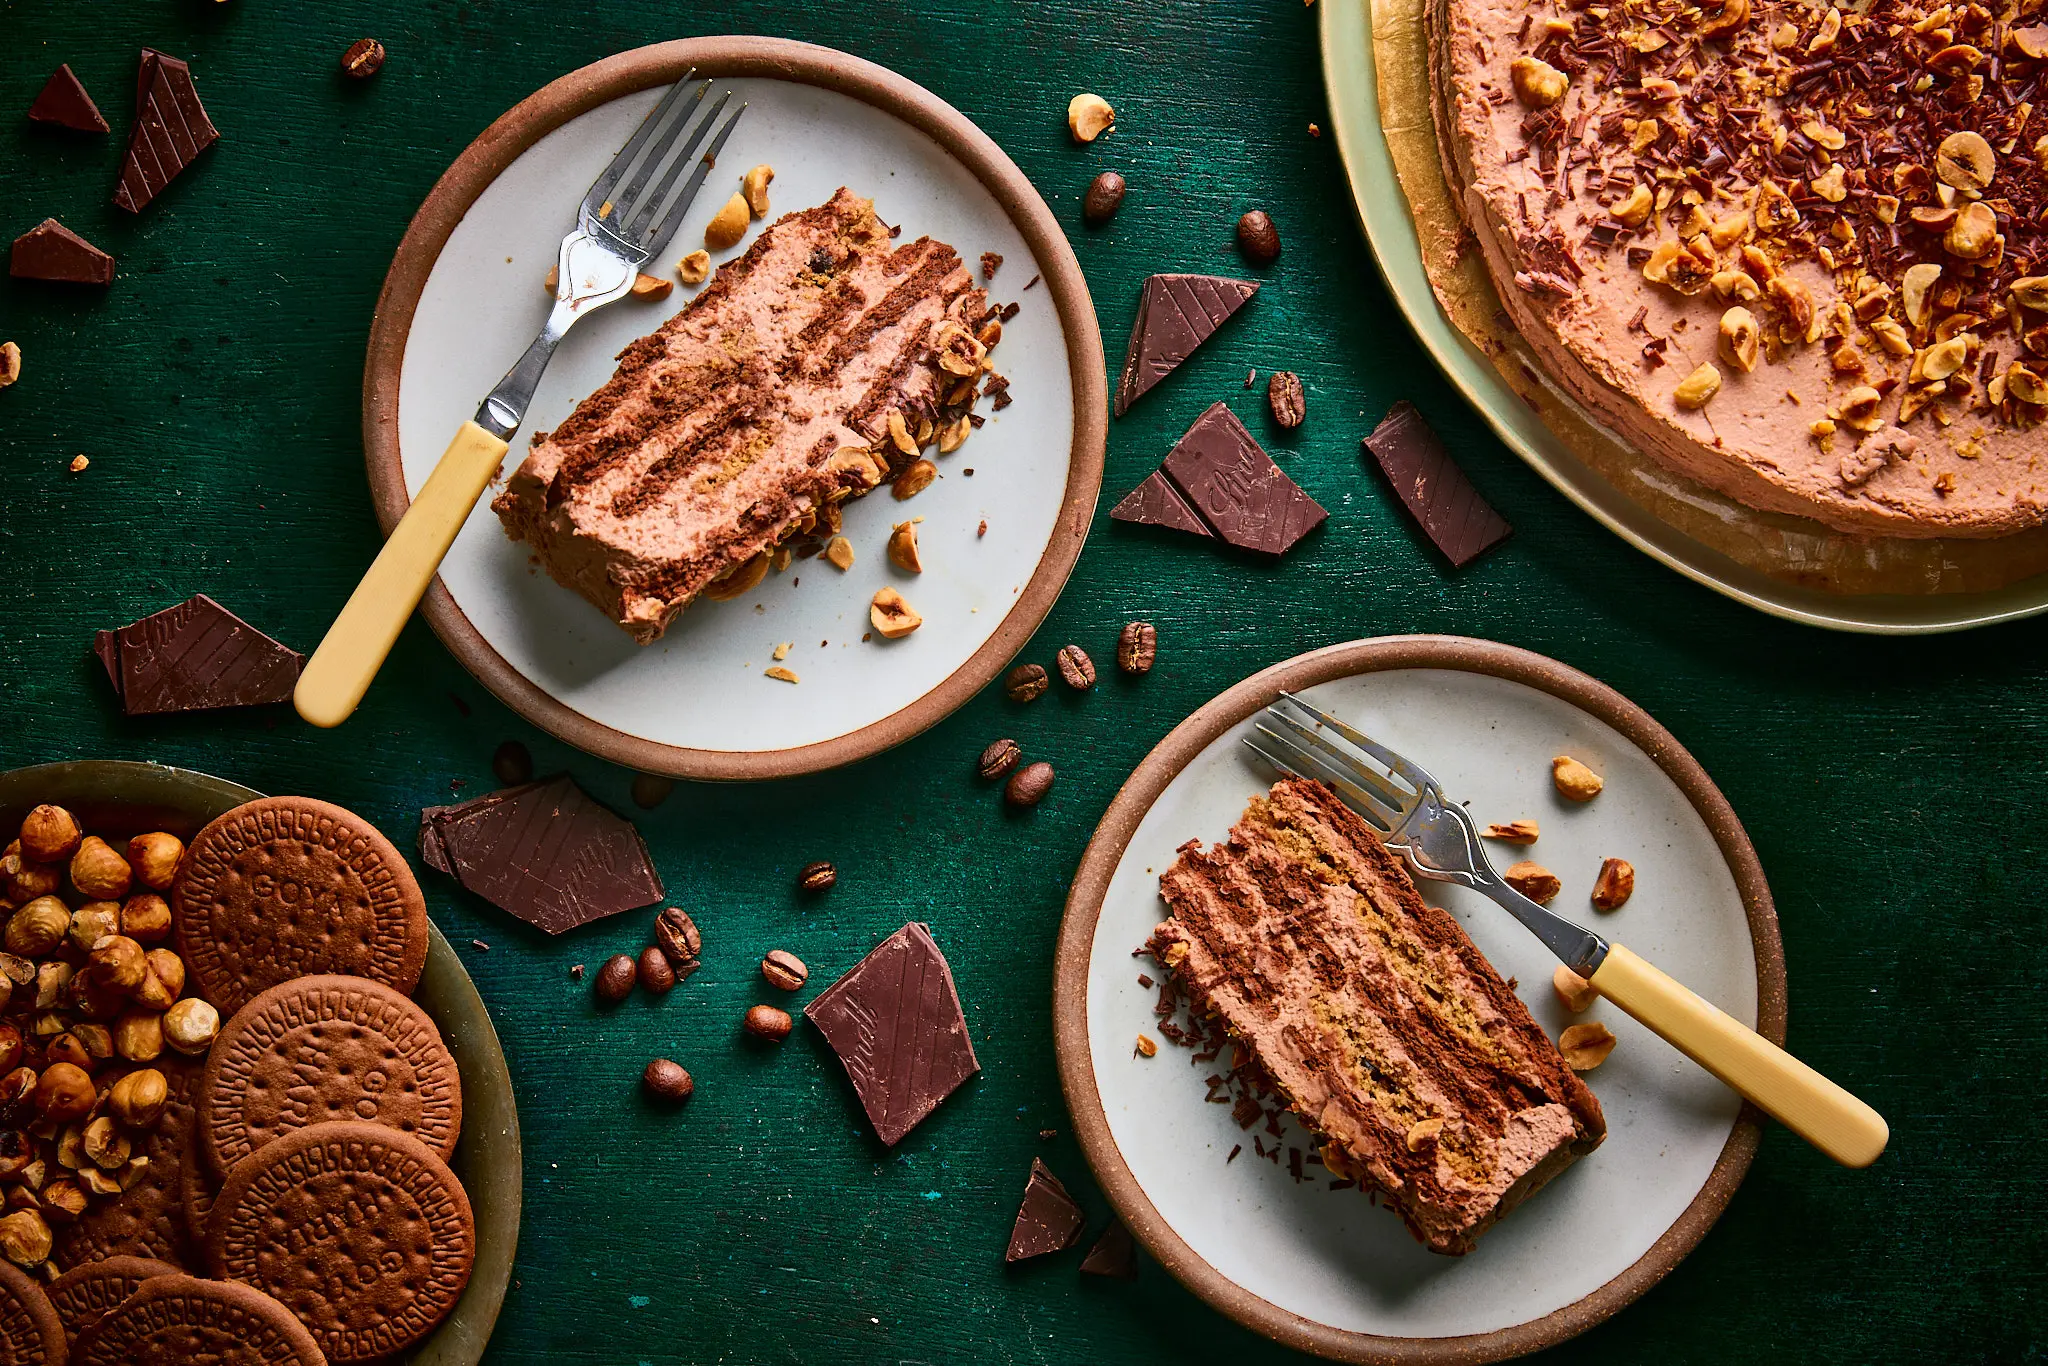
This cake is meant to be rustic and informal, so you could just estimate your layers. But if you like things neat and tidy and want each layer to be exactly the same, a scale will make that easier. The cream mix should weigh around 1200g, so each of the five layers should weigh 240g. This works out to about 1 1/3 cups for each layer.
Start with a layer of wafer cookies, breaking some of them up to loosely fill in the gaps. This doesn’t need to be perfect. Top with the first layer of cream (240g or 1 1/3 cups), and spread it out as evenly as you can with a small offset spatula or back of a spoon.
Next, add a layer of the chocolate chip cookies. For Tate’s brand, half the bag is 7 cookies. Lay those in and fill in any gaps with broken up wafer cookies. Add another layer of cream. Repeat these steps, alternating cookies, ending up with a final layer of cream. Smooth it well, cover the cake well with plastic wrap and refrigerate it overnight (and up to 2 days).
When you’re ready to serve, top it with a good sprinkle of chopped toasted hazelnuts, and shaved bittersweet chocolate. We like it best cold, but you could serve it at a cool room temperature. Don’t let it get too warm though, or it will start to get messy.
So there it is. One of the simplest, and most delicious, make-ahead desserts we’ve ever made. We hope your guests like it as much as ours did!


Mocha Hazelnut Icebox Cake
Equipment
- 1 9-inch springform pan (or a 9-inch baking dish)
Ingredients
For the Cream:
- 16 ounces mascarpone cheese cold (450g)
- 2 cups heavy cream cold (460ml)
- 1/2 cup granulated sugar 100g
- 1/3 cup hazelnut liqueur such as Frangelico (80ml)
- 2 tablespoons unsweetened cocoa powder 15g
- 1 1/2 teaspoons instant espresso powder 3g
- 2 teaspoons vanilla paste or extract
- 1/4 teaspoon fine sea salt
For the Cake:
- 1 8-ounce package thin chocolate chip cookies (recommended, Tate's Bake Shop)
- 3 7-ounce sleeves chocolate wafer cookies (recommended, Goya Chocolate Maria Cookies)
- 3 tablespoons Shaved semisweet chocolate for garnish
- 1/4 cup Chopped toasted hazelnuts for garnish
Instructions
- Add the mascarpone and 2 tablespoons of the cream to the bowl of an electric mixer fitted with the whisk attachment, and whisk on low speed until mascarpone is smooth (about 1 minute). With mixer on low, slowly drizzle in the rest of the cream, a tablespoon or two at a time, until the mascarpone and cream are combined and smooth. Scrape down the bowl and make sure all the cheese is combined.
- Add in the sugar, hazelnut liqueur, cocoa powder, espresso powder, vanilla and salt. Mix on low speed to combine and then slowly raise the speed, until it forms firm peaks, about 3 minutes.
- To assemble the cake, arrange a flat layer of wafer cookies (about 10 Maria cookies), covering the bottom as much as possible. Break some cookies as needed to fill in the gaps. Spread a fifth (240g, or about 1 1/3 cups) of the cream mixture evenly over the cookies. Place a layer of chocolate chip cookies on top (7 Tate’s cookies, plus a couple of broken wafer cookies to fill in the gaps), followed by another fifth of the cream. Continue layering cookies and cream, alternating types (2 layers chocolate chip, 3 layers chocolate wafer), until there are 5 layers of each, ending with a layer of cream.
- Smooth the top, cover with plastic wrap, and refrigerate overnight, or up to 2 days ahead.
- Run a small sharp knife around the outside of the cake and remove the sides of the pan. Sprinkle the top with the chocolate and hazelnuts, cut in slices, and serve cold.